
Did you try to push to a GitHub repo but received an error like this?

This error happens because as of August 13, 2021, you can no longer push code to GitHub with your username and password. This is in efforts to make their platform as safe as possible.
Luckily, this issue is easy to fix. Instead of using a password to push code to Git, you need a personal GitHub access token.
A Step-by-Step Guide to Fixing “Password Authentication Was Removed Error”
To fix the “Support for password authentication was removed” error, you need to generate a GitHub access token with which you can push to the repos.
Here’s a step-by-step- guide to creating an access token for your GitHub use.
1. Sign In to GitHub

Sign in to your GitHub account with your username and password like you’d normally do.
2. Go to GitHub Settings

Choose the Settings tab by clicking the dropdown on the top right corner near your profile image.
3. Choose Developer Settings

In the settings view, take a look at the bottom corner of the left-hand side panel. Click Developer Settings.
4. Click “Personal access tokens” Link

Next, select Personal access tokens and choose the Tokens (classic) option.
5. Generate a New Token (classic)

Next, select Generate new token (classic) to create a new GitHub access token for yourself.
6. Set Up the Token

There are three things you need to keep in mind when creating an access token on GitHub:
- Note/description of the token to remind yourself where the token is used. I use something like “My general GitHub access token”. If you need more tokens, make sure to add clear descriptions.
- Expiration date to make the access token expire in the near future. You can choose a token that doesn’t expire but GitHub highly suggests not!
- Scope in which the access token is going to be used. I have a hobby GitHub account with not-so-important projects so I just chose every option from the list. But make sure to read the scopes carefully and not to give too broad access if it’s unnecessary.
9. Generate Token
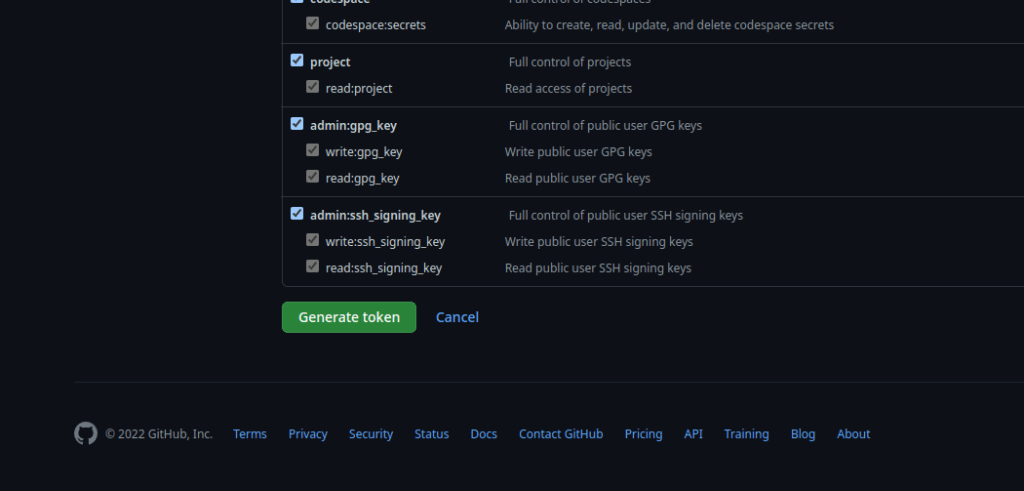
Once you’ve set up the access token, click Generate Token to go live with it. You’re only going to see the access token once, so make sure to keep it somewhere safe.
If you lose your token, you can always generate a new one with ease. But this will break scripts and applications that might be using the previous one!
10. Use the Token Instead of Password

Now you’re all set to start pushing to GitHub again. Now, instead of entering the password, you should enter the access token you just generated!
Thanks for reading. Happy coding!