
An array is one of the key data types in JavaScript. It allows you to store values in a common place where it’s easy to access the values.
This is a comprehensive guide to looping through arrays in JavaScript.
You will learn multiple different and useful ways in which you can iterate over arrays. Which method should you use depends on what you’re trying to accomplish.
Here’s a short overview of the approaches you will learn in this guide:
- for loop
- for…of loop
- while loop
- do…while loop
- forEach() function
- map() function
- every() function
- for…in loop and why you should not use it
Let’s jump into it!
1. for Loop
The for loop is a control flow statement that allows you to execute a block of code a specific number of times.
Here’s an example of a for loop that loops through an array of integers and displays each value in the console:
const myArray = [1, 2, 3, 4, 5];

// loop through the array using a for loop
for (let i = 0; i < myArray.length; i++) {
  // print the current element of the array
  console.log(myArray[i]);
}
Output:
1
2
3
4
5
The above loop starts by setting the value of the i variable to 0, which is the first index of the array. The loop will then continue to execute as long as i is less than the length of the array.
In each iteration of the loop, the i variable will be incremented by 1 (the i++ part), and the current element of the array will be printed to the console. Once i is equal to the length of the array, the loop terminates.
2. for…of Loop

The for…of loop is a popular variation of a for loop in JavaScript. It allows you to iterate over the elements of an iterable object, such as an array.
Here’s an example of how it works. Similar to the previous example, let’s print an array of integers using the for…of loop:
const myArray = [1, 2, 3, 4, 5];

// loop through the array using a for...of loop
for (const element of myArray) {
  // print the current element of the array
  console.log(element);
}
Output:
1
2
3
4
5
In the above code, during each iteration, the element variable will be set to the current element of the array, and the current element will be printed to the console. The loop will continue to execute until it has iterated over all of the elements of the array.
The for…of loop is similar to the for loop, but it is more concise and easier to read. It is particularly useful when you want to iterate over the elements of an array without caring about the indices of the elements.
3. while Loop
The while loop is the other main loop type in JavaScript (similar to other programming languages). It allows you to execute a block of code repeatedly as long as a given condition is true.
For example, let’s loop through an array of numbers with a while loop:
const myArray = [1, 2, 3, 4, 5];

// initialize a variable to keep track of the current index
let i = 0;

// loop through the array using a while loop
while (i < myArray.length) {
  // print the current element of the array
  console.log(myArray[i]);

  // increment the index variable
  i++;
}
Output:
1
2
3
4
5
This while loop will print each element of the myArray array to the console.
The loop starts by setting the value of the i variable to 0 which refers to the index of the first array element. The loop then continues to execute as long as i is less than the length of the array.
During each iteration, the i variable increments by 1, and the current element of the array will be printed to the console. Once i is equal to the length of the array, the loop stops.
The while loop is similar to the for loop, but it gives you more control over the looping process. It is especially useful when the number of iterations is not known in advance.
4. do…while Loop
The do…while loop is a variation of the traditional while loop in JavaScript. A do…while loop guarantees that the block of code will be executed at least once no matter the condition.
For example, let’s loop through an array of numbers using the do…while loop:
const myArray = [1, 2, 3, 4, 5];

// initialize a variable to keep track of the current index
let i = 0;

// loop through the array using a do...while loop
do {
  // print the current element of the array
  console.log(myArray[i]);

  // increment the index variable
  i++;
} while (i < myArray.length);
Output:
1
2
3
4
5
This loop starts by executing the code inside the loop, which will print the first element of the array to the console. Then it continues as long as i is less than the length of the array.
Similar to the while loop in the earlier example, the i variable will be incremented by 1 during each iteration and the current element of the array will be printed to the console. Once i matches the length of the array, the loop stops.
The do…while loop is useful if you need to make sure the loop is executed at least once, even if the given condition is false from the jumpstart.
That being said, looping through an array using a do…while loop just to read all the values makes little sense. Instead, you can do it with a traditional while loop or even better using the for loops from earlier sections.
Now you’ve learned the basic loop types of JavaScript. The next couple of approaches teach you how to loop through arrays by using built-in array methods that are based on looping.
5. forEach() Function

The forEach() is a built-in Array object in JavaScript. It allows you to loop through elements of an array and execute a given function for each element.
Important: The forEach() function does not wait for promises! In other words, using this function can cause issues when working with asynchronous code.
Here’s an example of how you can use the forEach() function to loop through an array of numbers:
const myArray = [1, 2, 3, 4, 5];

// use the forEach() function to loop through the array
myArray.forEach(element => {
  // print the current element of the array
  console.log(element);
});
Output:
1
2
3
4
5
This prints each number to the console.
During each iteration of the loop, the element variable will be set to the current element of the array, and the current element will be printed to the console. The loop continues until it has gone through all the elements of the array.
The forEach() function is similar to the for…of loop, but it allows you to specify a function to be executed for each array element. This is useful if you want to perform a particular operation on each element of the array.
Just keep in mind you cannot use control flow statements like break or continue in the forEach() function. Neither can you use the await keyword or promises!
At this point, you’ve learned 5 ways to loop through an array in JavaScript. These methods offer a pure solution for simple array iteration. Next, you will learn some useful array methods that implement looping but are applicable in particular scenarios.
6. map() Function
The map() function is a method of the Array object in JavaScript. It allows you to create a new array from an existing one by applying a function for each element of the array.
For example, given an array of numbers, let’s create a new array with the original values doubled:
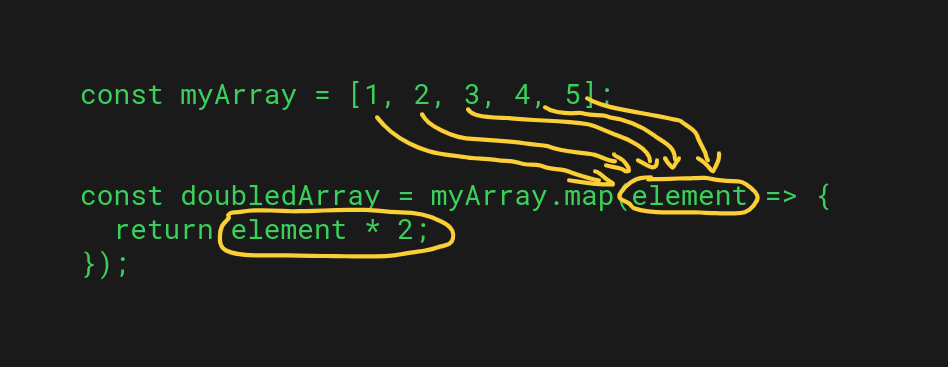
const myArray = [1, 2, 3, 4, 5];

// use the map() function to create a new array
const doubledArray = myArray.map(element => {
  // return a new element that is double the original element
  return element * 2;
});

// print the new array
console.log(doubledArray);
Output:
[ 2, 4, 6, 8, 10 ]
This code creates a new array that has the elements of the original array doubled.
The map() function resembles a loop that goes through the elements of the original array one by one. On each iteration, the element variable is set as the current element, and a new element that is double the original element will be added to the new array. The loop continues until it has doubled all the elements of the original array.
The map() function is similar to the forEach() function, but it allows you to create a new array from an existing one by performing an operation on each array element. This is useful if you want to transform the elements of an array in some way.
7. every() Function
The every() method is an Array method that allows you to check whether all of the elements of an array meet a given condition. Behind the scenes, it implements a simple loop that goes through all the array elements one by one.
For example, here’s how you can use the every() function to loop through an array to check if all elements satisfy a condition.
const myArray = [1, 2, 3, 4, 5];

// use the every() function to check if all of the elements are greater than 0
const areAllPositive = myArray.every(element => {
  // return true if the element is greater than 0, otherwise return false
  return element > 0;
});

// print the result
console.log(areAllPositive);
Output:
true
This checks whether all of the elements of the myArray array are greater than 0. During each iteration of the every() method loop, the element variable set to the current element of the myArray array, and the given condition will be checked.
If all the elements meet the condition, the result is true. The loop will continue to execute until it has gone through all the elements.
Speaking of methods that can be used to loop through arrays in JavaScript, there are many more than just the map() and the every() method. For example, you could use reduce(), some(), or includes(). Because this is not a tutorial about the array methods in JavaScript, we’re going to cut it here.
8. for…in Loop – Do NOT Use!
The for…in loop is a very similar type of for loop to the for…of loop introduced earlier. But the key difference is that the for…in loop is meant to loop through the keys of an object instead of looping through iterables like an array.
For instance, let’s go through the properties of a JavaScript object:
// define an object with three properties
const myObject = {
  first: 1,
  second: 2,
  third: 3
};

// loop through the object using a for...in loop
for (const key in myObject) {
  // print the current property of the object
  console.log(`${key}: ${myObject[key]}`);
}
Output:
first: 1
second: 2
third: 3
While the for…in loop is useful for iterating over the properties of an object, don’t use it to iterate over the elements of an array.
This is because the for…in loop is designed to work on objects and the object keys. If you use for…in on an array, it returns the indexes associated with the array elements instead of the values of the array.
Thanks for reading. Happy coding!