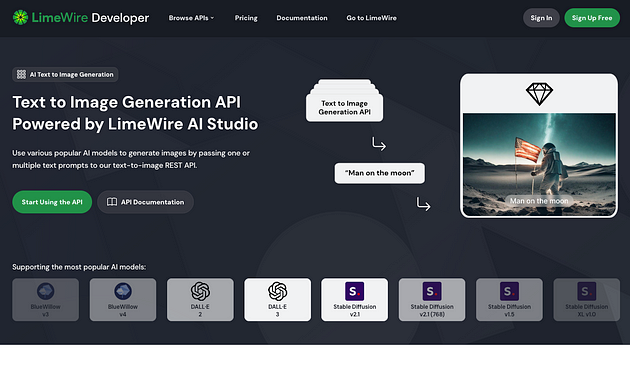
LimeWire is an AI platform that lets you generate images, videos, music, and more. You can even monetize your work on the platform.
But on top of this, LimeWire also has a cool developer API. This means you can easily create your own AI apps, such as:
- Text-to-image tools
- Image-to-image apps
- Image upscaler software
And more.
Also, you can test each API for free to be sure about the integration before paying for it.
This is a developer-focused review of LimeWire Developer API. For example, I will show you how to create an AI image generator in only 15–30 minutes.
Disclaimer: This post has affiliate links at no cost to you. Thanks for the support!
LimeWire Developer APIs
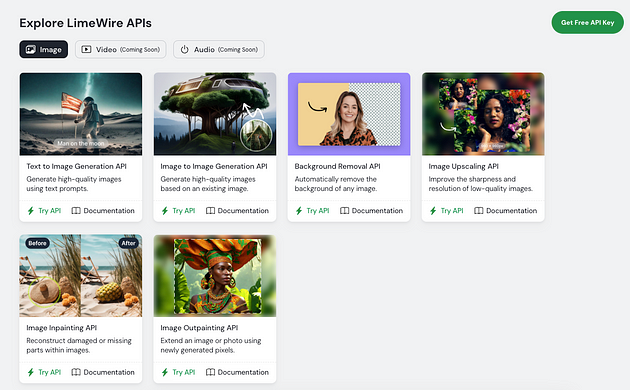
Let’s start by listing the developer APIs available on LimeWire:
This means you can code any one of these services to your project. Pretty cool, huh?
Also, the API documentation is good, so you will find examples that will get you there a lot quicker.
Accessing LimeWire API Keys
Before creating applications or integrations on top of LimeWire, you need an API key.
Here’s how to do it.
First, head over to the LimeWire.com APIs page and choose an API you want to use.
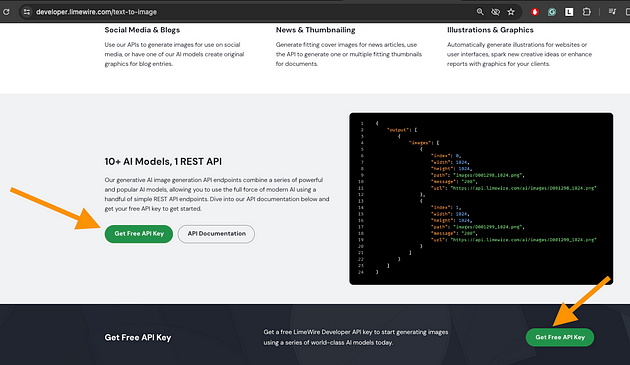
I’m going with the text-to-image API. Then click on the Generate free API key button.
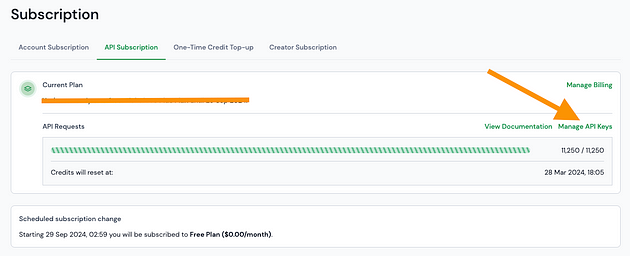
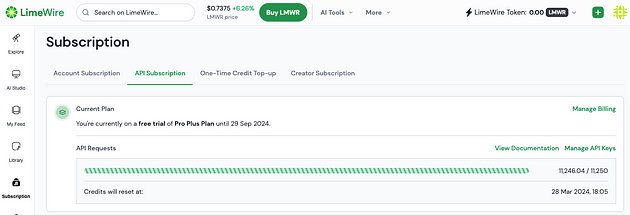
This will take you to the API subscription page. Click on “Manage API Keys”.
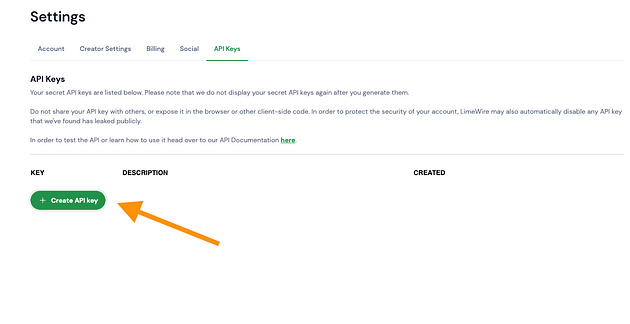
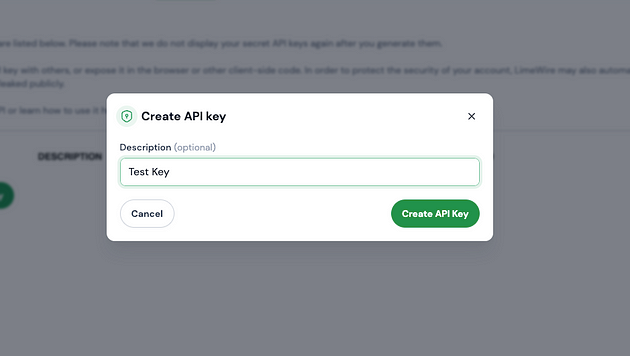
Then click “Create API key”. This will assign you a unique API key with the name you like.
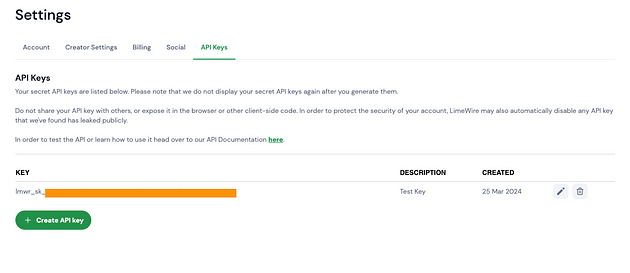
You can view the API key in the API keys tab on the Account Settings page.
One thing I noticed with LimeWire API was that for some reason the API key page is difficult to locate.
If I click the Developer API from the settings page:
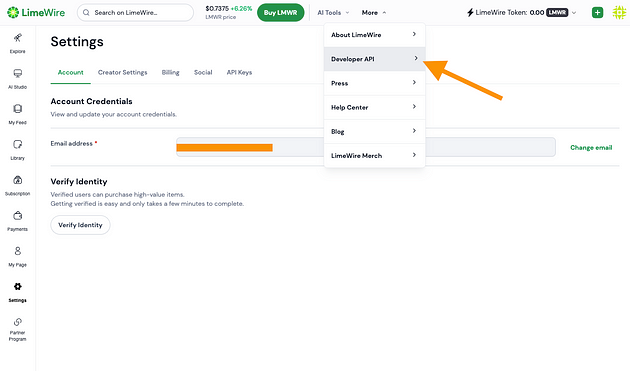
It sends me to the API plans page and seemingly signs me out.
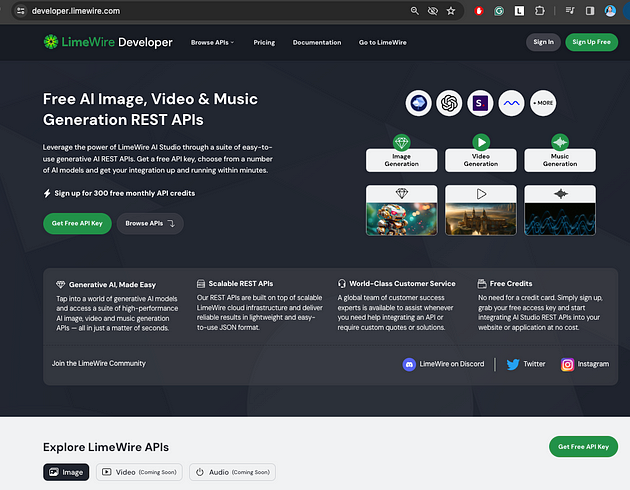
But if I then click on “Get Free API Key” and click on “Sign Up”, then it will redirect me to the developer API page and have me signed in.
That’s a bit inconvenient. But to avoid the hassle, you can always navigate to https://limewire.com/u/settings/api-keys to find your API keys.
Example: Building Your Own AI Generator
Ever wanted to create your own AI image generator?
It’s never been easier before. I created mine in 15 minutes with LimeWire API.
Let me show you how.
(This is a developer-only guide. If you have a coding background, this should be easy to follow. But if you aren’t a coder, then nothing below will make sense!)
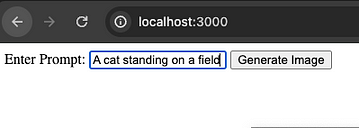
So here’s my simple local host web app I created with LimeWire’s developer API. It takes a prompt:
And returns and shows an image:
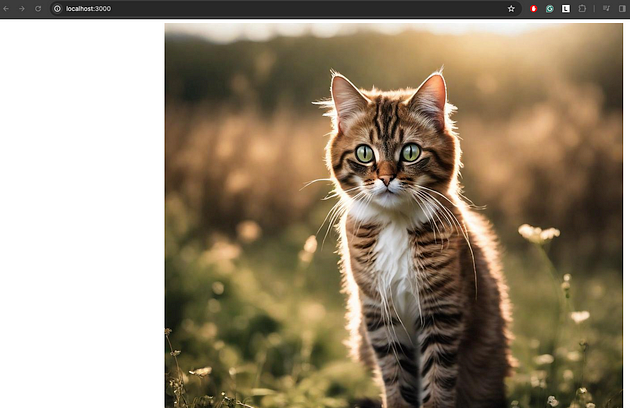
This is a basic AI image generator API that I now own. Pretty cool, right?
Here’s a step-by-step guide on how I set it up.
To create a web app on LimeWire’s API, you need an account and an API key. (If you haven’t already signed up and created one, follow my instructions before this section above!)
To generate an image with LimeWire from your web app project, you need to access the text-to-image API.
The documentation and examples are good. Hook those up with ChatGPT and you’ll create web apps blazingly fast.
Let me show you how I was able to create a web app.
First, create a new project folder. For example, I called mine “lmwr_test”.
Then navigate to that project folder with your terminal/command line.

Then run the following command:
npm init -y
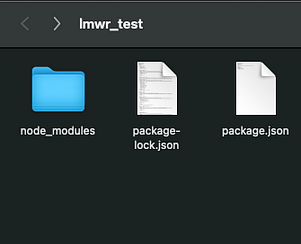
This initializes a new Node.js project which will be your web app.
It will auto-generate some useful files and folders for your project, so now your project folder should look like this:
Then, you need to install Express and node-fetch to your web app by running:npm install express node-fetch
Then create a server.mjs file to your project with the following code (AND remember to place your API key in the code:)
import express from 'express';
import fetch from 'node-fetch';
const app = express();
const PORT = 3000;

app.use(express.static('public'));
app.use(express.json());

app.post('/generateImage', async (req, res) => {
  const apiUrl = 'https://api.limewire.com/api/image/generation';
  // Please make sure to handle your API keys securely and avoid exposing them in your code.
  const apiKey = 'YOUR_lmwr_sk_*_HERE';

  try {
    const apiResponse = await fetch(apiUrl, {
      method: 'POST',
      headers: {
        'Content-Type': 'application/json',
        'X-Api-Version': 'v1',
        Accept: 'application/json',
        Authorization: `Bearer ${apiKey}`
      },
      body: JSON.stringify(req.body)
    });

    const data = await apiResponse.json();

    // Check if data field exists and has at least one asset
    if (data.data && data.data.length > 0) {
      // Return the `asset_url` of the first asset
      res.json({ imageUrl: data.data[0].asset_url });
    } else {
      // Handle cases where the assets might not be present in the response
      console.error('No assets found in response:', data);
      res.status(500).json({ error: 'No assets found in API response' });
    }
  } catch (error) {
    console.error('Error fetching image:', error);
    res.status(500).json({ error: 'Failed to generate image' });
  }
});

app.listen(PORT, () => console.log(`Server running on http://localhost:${PORT}`));
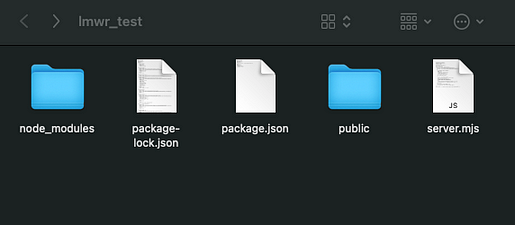
Then create a folder called public to your Node.js project folder.
Now your project should look like this:
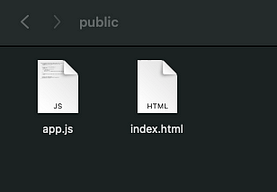
Then navigate to the public folder and create two files:
- app.js
- index.html
Then let’s create the simple UI for your AI image generator. To do this, copy-paste the following code to the index.html:
<!DOCTYPE html>
<html lang="en">
<head>
    <meta charset="UTF-8">
    <meta name="viewport" content="width=device-width, initial-scale=1.0">
    <title>Image Generator</title>
</head>
<body>
    <label for="promptInput">Enter Prompt:</label>
    <input type="text" id="promptInput" placeholder="Type your prompt here...">
    <button id="generateButton">Generate Image</button>
    <img id="imageDisplay" src="" alt="Generated Image" hidden>
    <script src="app.js"></script>
</body>
</html>
This creates a simple “Generate Image” button and a text field where you can describe the image you want to see.
Then, copy-paste this code to your app.js file:
document.getElementById('generateButton').addEventListener('click', async () => {
    const promptText = document.getElementById('promptInput').value;
    if (!promptText) {
        alert('Please enter a prompt.');
        return;
    }

    const response = await fetch('/generateImage', {
        method: 'POST',
        headers: {
            'Content-Type': 'application/json',
        },
        body: JSON.stringify({
            prompt: promptText,
            aspect_ratio: '1:1' // Assuming you want to keep a square aspect ratio; adjust as needed
        })
    });

    if (!response.ok) {
        console.error('Failed to generate image:', await response.text());
        return;
    }

    const data = await response.json();
    const imageDisplay = document.getElementById('imageDisplay');
    imageDisplay.src = data.imageUrl;
    imageDisplay.hidden = false;
});
This code:
- Takes the prompt from the HTML file.
- Sends the prompt to the text-to-image service on LimeWire.
- Grabs the generated image from the server.
- Shows the generated image in the web app.
Now your web app is ready!
Just make sure that the server.mjs file uses your API key instead of the placeholder one that’s there by default.
To run the app, start a local host server. To do this, open your terminal in the project folder and run:
node server.js
Now you should have a web app that looks like this:
Feel free to generate images with it and customize the outlook with CSS to make it look nicer.
My Take
I love how easy it was to develop a simple integration like this.
Of course, the style and design are not there, but that’s always the responsibility of a developer or designer.
Thanks to the LimeWire API docs, it was easy to follow along and to create an app. I hooked the docs up with some ChatGPT prompts and Voila! I had a simple AI image generator app in just minutes.
LimeWire Docs Allow for Test Requests
The LimeWire developer API gives you sample codes you can test the API with easily.
You don’t need to set up a code project to get a hunch of how fast and reliable the API is and get an idea of the output quality. Instead, you can quickly send the test requests on the documentation page.
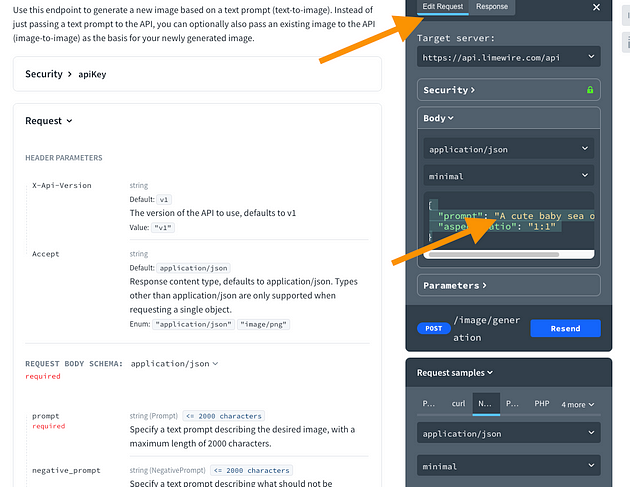
For example, here I’m testing the image-to-image generator API.
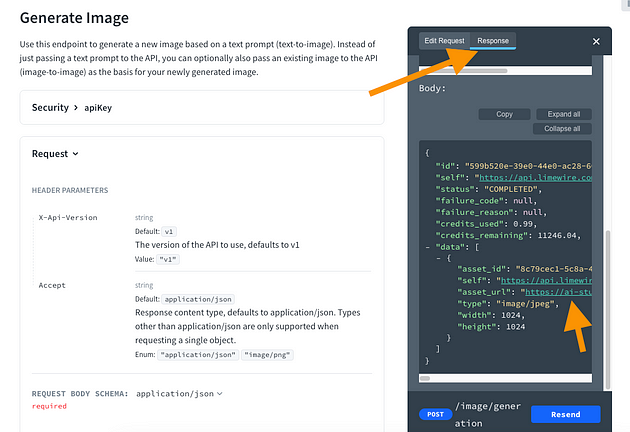
Once you’ve sent the test request, you can access your image with the “Response” tab’s asset URL:
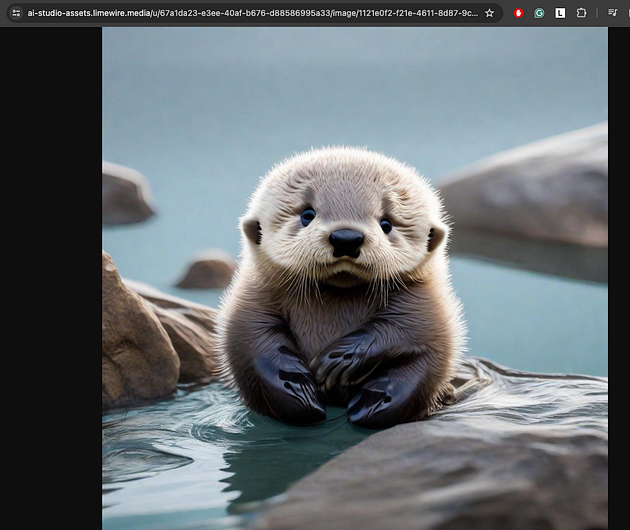
For me, the generated output image looks like this:
Remember that you can also edit the test request. For example, if you want to change the prompt, you can do so:
This is super useful and most APIs I’ve played throughout the years don’t have this kind of versatile testing features.
Modifying Images with LimeWire API
Besides the one text-to-image API, there’s a whole bunch of other LimeWire APIs you might find useful.
These APIs allow you to perform operations on existing images.
At the time of writing, LimeWire has API endpoints for AI-powered:
- Image-to-image art
- Upscaling (improving image quality)
- Inpainting (reconstructing parts of an image)
- Outpainting (extending the bounds of an image)
The documentation shows you exactly how to use these features, but one thing worth mentioning is the workflow.
The Workflow
To use an API endpoint that operates on an existing image, you need to follow these steps.
- Send an image.
- Receive an image ID.
- Modify the image with the ID.
- Show the output.
Here’s a closer look at the process.
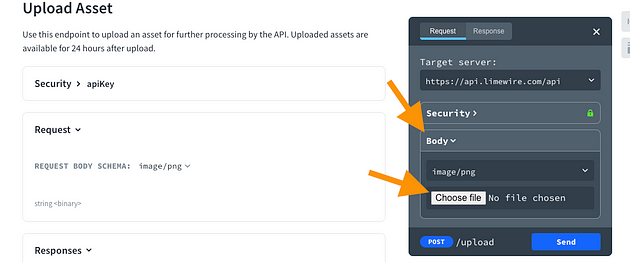
To modify an existing image, first, upload that image to the LimeWire uploadAsset endpoint. You can test this feature with the interactive docs.
I used this small low-res image as my input:

To use and modify that image with AI, grab the asset_id from the response.
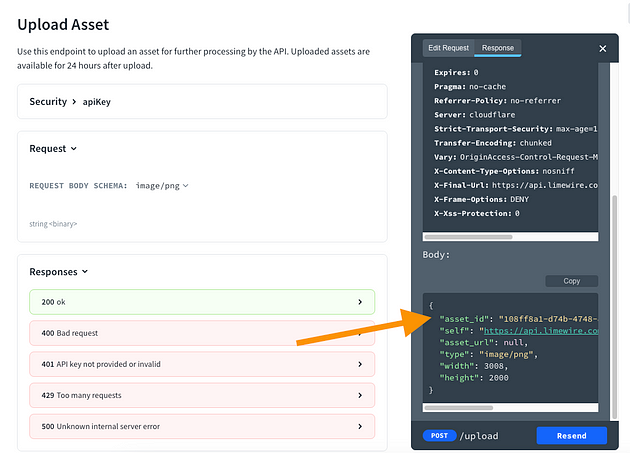
Use the asset_id on an endpoint to operate on that image.
For example, I’m using the Upscale Image endpoint to make the image bigger without losing quality. I upscaled the image to 3x of the original size.
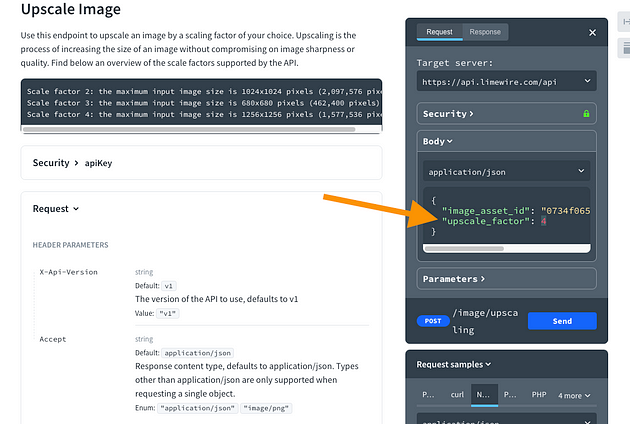
Then send the image operation request.
After a while, you will receive the processed image response. Grab the URL of the processed image to show it to your users.
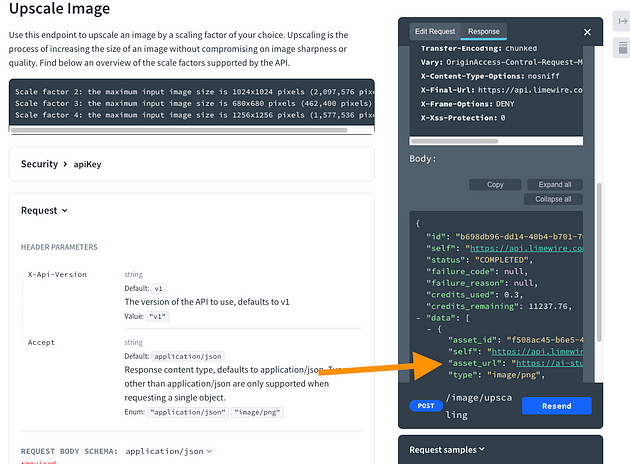
For example, here’s the upscaled image:

The image is now 3x bigger than the original one, but the quality did not suffer. That’s epic!
You can use the other image-to-image operations in a similar workflow. Just read the docs for your specific endpoint first.
LimeWire AI API Documentation
LimeWire API documentation is a good example of modern and interactive documentation—that’s what every documentation should be like!
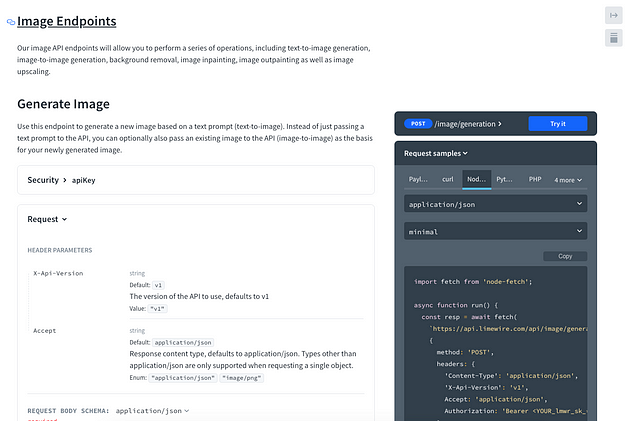
There are good code examples for different use cases.
For instance, you will find Python and Node.js project examples for each image endpoint.
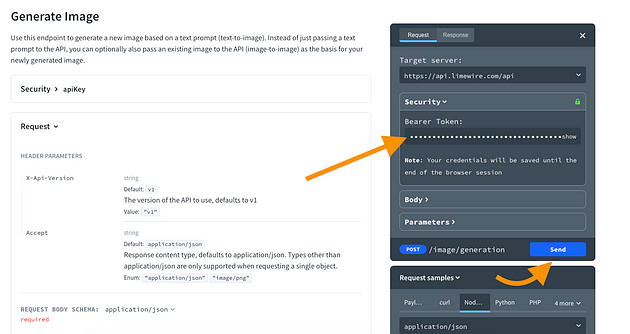
Then you can also try the API endpoints directly from the documentation.
That’s something I haven’t seen often and it’s very useful. Just remember to place your API key in the “Security” tab so that the requests will fire.
👍 Pros
- High-quality result images
- Quick loading times
- Multiple AI-powered APIs for different use cases
- Simple API workflow (upload image, wait for AI to process, show result)
- Good documentation with good examples
- Interactive documentation for testing purposes
- Epic coming-soon API features
👎 Cons
- Occasional issues with result accuracy with operations on existing images
- Developer API redirects and signs me out. Not a problem for my app users, but it’s inconvenient for me
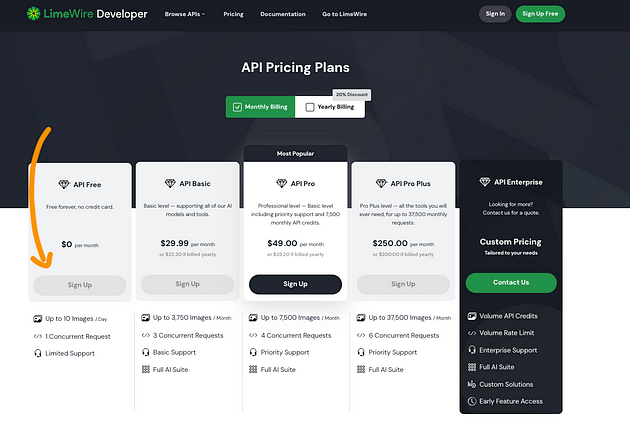
Pricing
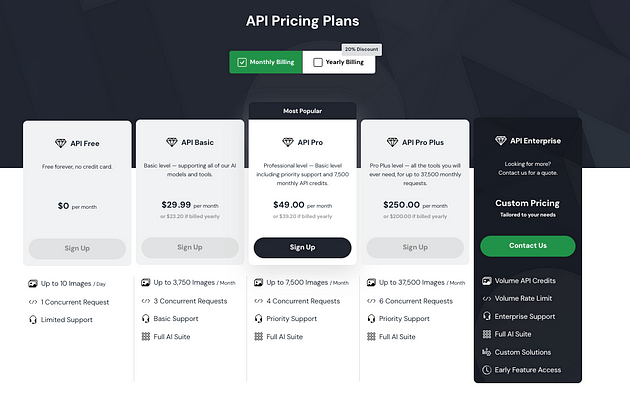
- API Free: $0/mo (up to 10 images per day)
- API Basic: $29/mo (up to 3,750 images per month)
- API Pro: $49/mo (up to 7,500 images per month)
- API Pro Plus: $250/mo (up to 37,500 images per month)
- API Enterprise: Contact the sales team (tailor-made requests and plan)
Try LimeWire Developer APIs for FREE
To Take Home
LimeWire developer API is awesome. It has a bunch of cool AI endpoints with which you can generate, upscale, and inpaint images.
The documentations have a bunch of useful and interactive examples to play with.
If you’ve ever wanted to create your own AI apps or integrations, this is the perfect place to get started with it. The API is easy to use, and it has great documentation. Most importantly, the results are up to par with today’s AI standards which are rapidly changing.
On top of this, LimeWire will soon generate videos and music.
It’s free which means it’s worth trying even if you don’t have any plans for using one.