To redirect a web page with JavaScript, set the current page’s href property to a new URL.
For example:
window.location.href = "https://www.example.com/";
To redirect a page with HTML, add a meta tag that:
- Sets the http-equiv attribute to “refresh”.
- Specifies the delay in the content attribute 0.
- Specifies the URL attribute in the content attribute to a desired redirect URL.
For example:
<meta http-equiv="refresh" content="0; URL=https://www.example.com" />
In this guide, you learn how to redirect web pages with both HTML and JavaScript.
You are going to see one example with an HTML redirect and three examples of JavaScript redirects.
We are also going to talk about the pitfalls of each redirect method.
The Art of Redirecting Webpages
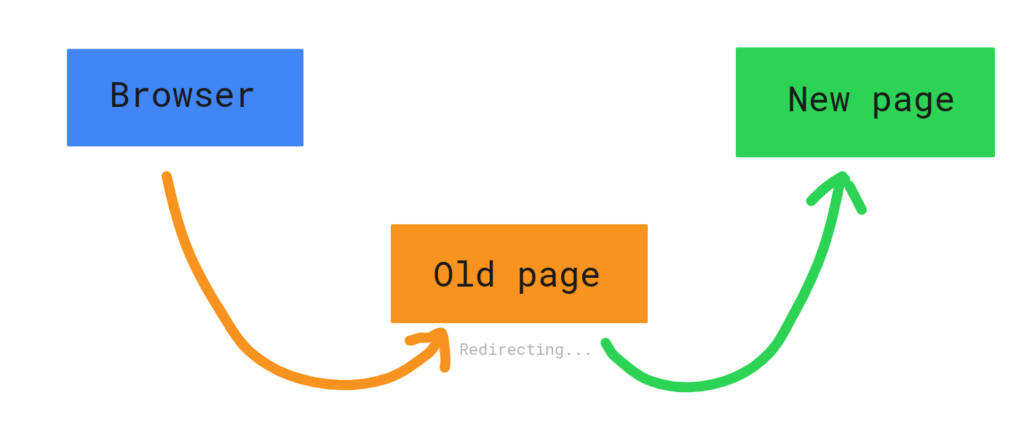
Redirecting means when a user lands on a page, they are automatically led to a new URL address.
If you are building a website, there is a great chance you need to redirect users at some point.
Common reasons for redirecting are:
- Moving to a new domain.
- Buying a second domain.
- Moving an existing page to a new address.
Let’s take a look at the different approaches to redirecting with JavaScript.
How to Redirect a Page with JavaScript
There are many situations in which you might want to use client-side redirects with JavaScript.
For example:
- To associate the redirect to an event or user action.
- To run an A/B test.
- Lack of access to the .htaccess file or the server configuration.
- In case you need an extra validation layer before redirecting.
- Other reasons why HTTP redirect is not a viable option.
In this section, you learn the three most common ways to redirect a web page using JavaScript.
Change the window.location.href Property
Perhaps the most popular way to redirect a web page using JavaScript is by tweaking the window.location.href property.
For example, you can redirect a webpage to https://www.example.com by
window.location.href = "https://www.example.com/";
But what does this mean and how does it work?
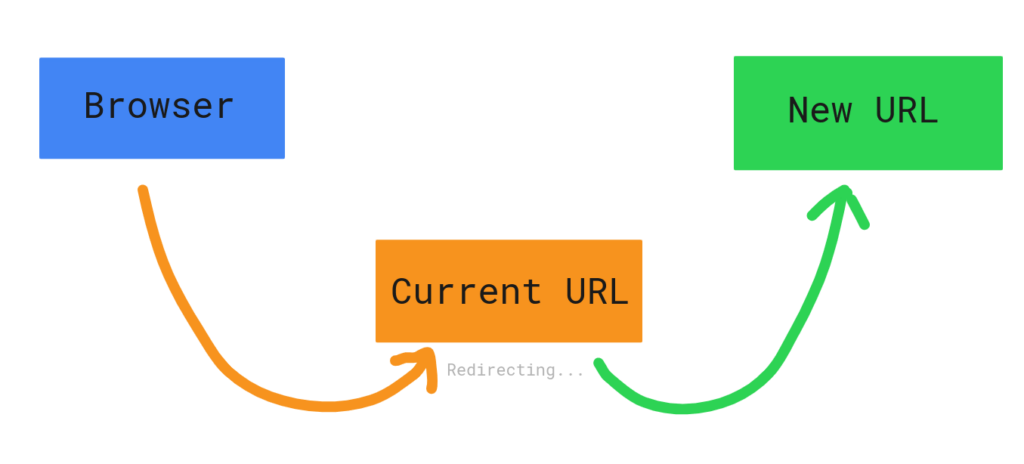
In JavaScript, the window.location.href is the URL currently being viewed.
If you change this property to another URL, you are telling the browser that the new URL is the one being viewed. This causes the browser to load the new URL. This is exactly the same as if a user clicked a new URL.
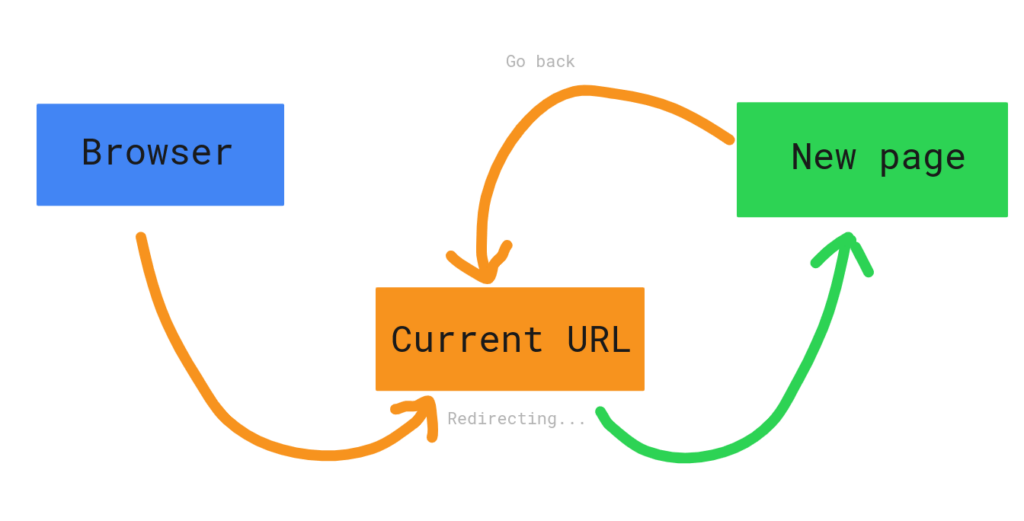
This type of redirect affects your browser’s session history.
In other words, a user that has been redirected with the window.location.href redirect can click the “back” button to head back to the originating page.
Speaking of the “back” button, make sure to tie this kind of redirect to a user action instead of automatically triggering it.
If a user clicks the “back” button, they end up in an endless redirect loop which is not good.
However, if the redirect is bound to an action the user must take, then they are able to go back to the original page without being redirected.
This style of redirect works a bit faster than calling a function (like the two following approaches below). Notice that the speed can vary depending on the browser you’re using.
Redirect with the location.assign() Method
Another way to redirect a page using JavaScript is by calling the window.location.assign() function.
This function takes a parameter that is the URL of the page to be redirected.
For example:
window.location.assign("https://www.example.com/");
From the user’s perspective, this works exactly the same way as the redirect in the previous chapter.
This approach creates a new entry into the user’s session history. Thus it is also possible to go back to the originating page when redirected this way.
But how does this differ from the redirect example from the previous chapter?
The window.location.assign() is a function that shows a document from a particular URL.
This approach can be a bit slower than the approach in the previous chapter. Of course, this depends on the browser you are using.
The window.location.assign() is also a somewhat safer redirecting approach. This is because if the target URL is broken, the assign() function throws a DOMException error with a message.
Remember that to make this redirect approach work, you need to use HTTPS instead of HTTP. Redirects to HTTP pages will not work.
Luckily, most of the quality pages these days use HTTP, so this should not be a problem.
Redirect with the location.replace() Method
The third common way to redirect a page is by calling the window.location.replace() function.
This function takes an argument which is the redirect URL as a string.
For instance:
window.location.replace("https://www.example.com/");
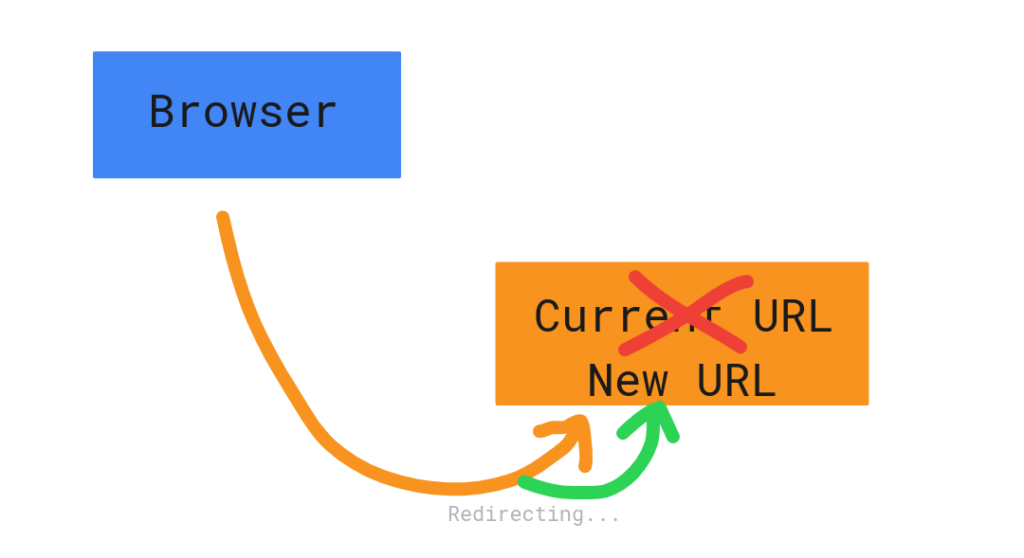
Unlike the previous two approaches, this method does not create a new entry to the user’s session history.
As the name suggests, it replaces the current entry in the session history with a new one.
In other words, the user cannot go back to the originating page.
This makes it an ideal option if you do not want the users to be able to come back to view the originating source page.
This function also throws a DOMException if trying to redirect to a broken page. This makes it safe.
This approach also requires you to use HTTPS to redirect.
How to Redirect a Page with HTML
To redirect a page with HTML, set up the following meta tag to your page’s HTML content:
<meta http-equiv="refresh" content="time; URL=new_url" />
Where:
- time is the time in seconds. This specifies how long it takes before the redirection occurs. Use 0 if you want the action to be immediate.
- new_url is the new URL you want to redirect the client.
For example:
<meta http-equiv="refresh" content="0; URL=https://www.example.com/" />
Here is a full HTML example of a web page that redirects immediately:
<!DOCTYPE html>
<html>
   <head>
      <title>Redirect Example Page</title>
      <meta http-equiv="refresh" content="0; URL=https://www.example.com/" />
   </head>
   <body>
      <p>Redirecting to another URL</p>
   </body>
</html>
The HTML approach is great because if a browser has disabled JavaScript, the redirect still works.
If a user is using an ancient browser, there is a chance that the meta tag does not render properly.
This means the user does not get redirected to the desired URL. Instead, they are stuck on the blank page.
To fix this issue, you can specify a fallback redirect link to the HTML content. The user can then click this link to be redirected.
For instance:
<p>
    <a href="https://example.com/">Click here to proceed.</a>
</p>
Here is the full example of a redirected page with the fallback redirect link:
<!DOCTYPE html>
<html>
   <head>
      <title>Redirect Example Page</title>
      <meta http-equiv="refresh" content="0; URL=https://www.example.com/" />
   </head>
   <body>
      <p>Redirecting to another URL</p>
      <p>
         <a href="https://example.com/">Click here to proceed.</a>
      </p>
   </body>
</html>
Now the redirect page looks like this:
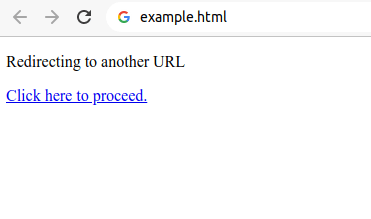
Conclusion
Today you learned how to redirect a webpage with HTML & JavaScript.
To recap, you can use JavaScript to redirect a web page by using these three approaches:
// Change the URL of the currently displayed page.
window.location.href = "https://www.example.com/";

// Assign a new entry to the session history and move the user there.
window.location.assign("https://www.example.com/");

// Call the replace function to replace the current session entry by a new URL.
window.location.replace("https://www.example.com/");
The latter two approaches are more secure because they only work with non-broken URLs. Also, they require you to use HTTPS to work. However, they can take slightly more time than the first approach.
You can also use HTML tags to trigger the redirect. This can be useful for example if the JavaScript is disabled from the client’s browser:
<meta http-equiv="refresh" content="0; URL=https://www.example.com" />
This can cause problems if the timestamp is 0 and the browser does not render the meta tag for one reason or another. Also, an ancient browser might not understand this.
Thus, you should create a fallback redirect link to the page to offer the user manual redirecting.