Jasper AI is one of the best-known AI writing assistants in the new wave of AI writing tools that have popped up seemingly out of nowhere in the past couple of years.
Jasper tool makes it possible to produce original and well-thought content 2–5 times faster than you would normally do. Better yet, this tool is really easy to use.
Today, I’m going to show you how to use the Jasper long-form assistant to write a blog post. We are going to build this 500-word article in 10 minutes:

Read also Best AI Copywriting Software.
Disclaimer: This post contains affiliate links that I receive a small commission at no cost to you.
How to Write a Blog Post with Jasper
In this guide, we are going to use Jasper Long-form assistant to write an AI-written blog post.
Make sure you sign up for a free trial of Jasper Boss Mode using this link.
Activate the Boss Mode in Jasper
To write a blog post with Jasper, activate the Boss Mode plan. This makes it possible for you to use the long-form assistant to write outstanding blog posts.

The long-form assistant is not included in the Starter mode.
Before getting our hands dirty, let’s make a quick comparison between the Starter mode and the Boss mode.
Starter Mode vs Boss Mode
Jasper comes with two modes, the Starter and Boss Mode. The latter is the most popular option because it unlocks all the cool features of Jasper, such as a long-form content assistant that we are going to use in this guide.
Here is a brief comparison between Starter and Boss Mode.
Starter Mode
With the starter plan, you have access to:
- 50+ short-form templates.
- 20 000+ words per month.
- 600 characters look back. (Jasper reads the last 600 characters to decide what to write).
You can use a free trial to test the starter plan. After the trial, this plan starts at $29/per month.
However, with the Starter plan you do not have access to these useful features:
- Long-form Assistant
- Jasper Commands
- Recipes
This is where the Boss Mode kicks in.
Boss Mode
The boss mode is the blogger’s go-to choice when using Jasper.
Boss Mode includes awesome features that the Starter plan does not:
- Blog post assistant.
- Generate AI content up to 5x faster.
- 3000 characters look back.
- Jasper Commands — tell Jasper what to write about.
- Recipes — pre-built Jasper templates that allow you to skip steps to produce content even faster.
- Compose Button — Tell Jasper to continue from where it left without giving any other input.
To follow this guide, you need to access the Boss Mode. Feel free to try it for free.

Outside the free trial, the Boss Mode pricing starts at $59/month.
After activating the Boss Mode, you are ready to start writing blog posts using AI.
Create New Blog Post Workflow
Go to Templates > Long-form assistant > Blog post workflow:

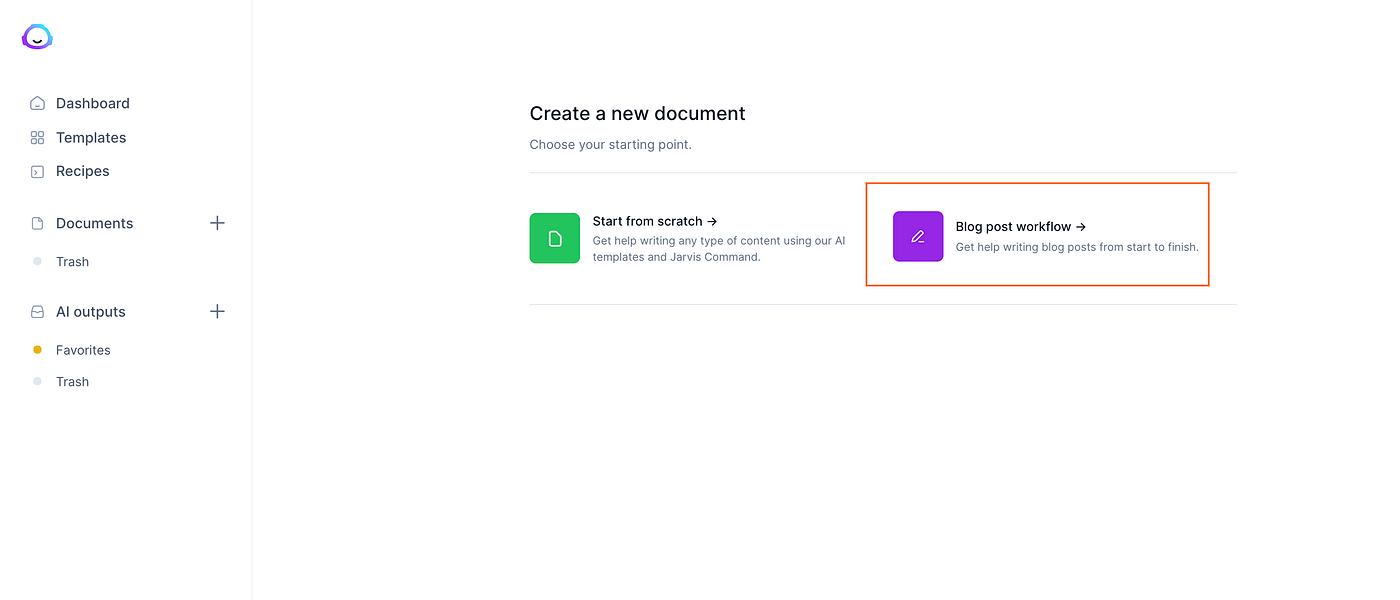
1. Describe the Content You Want to Create
On the Blog post workflow page, you are going to see a step-by-step guide on how to get started with the blog post.
As a first step, describe the content you want to create.
Remember, Jasper is a writing assistant. It cannot read your thoughts. So you need to give some input to it. This is important because it shows Jasper what you want to write about.
For example, let’s ask Jasper to start writing a blog post about search engine optimization (SEO) without any prior knowledge.
To do this, I describe the blog post for Jasper this way:
“Write a blog post about SEO, that is, search engine optimization. Tell the reader why SEO matters and how it can change traffic on any website.”
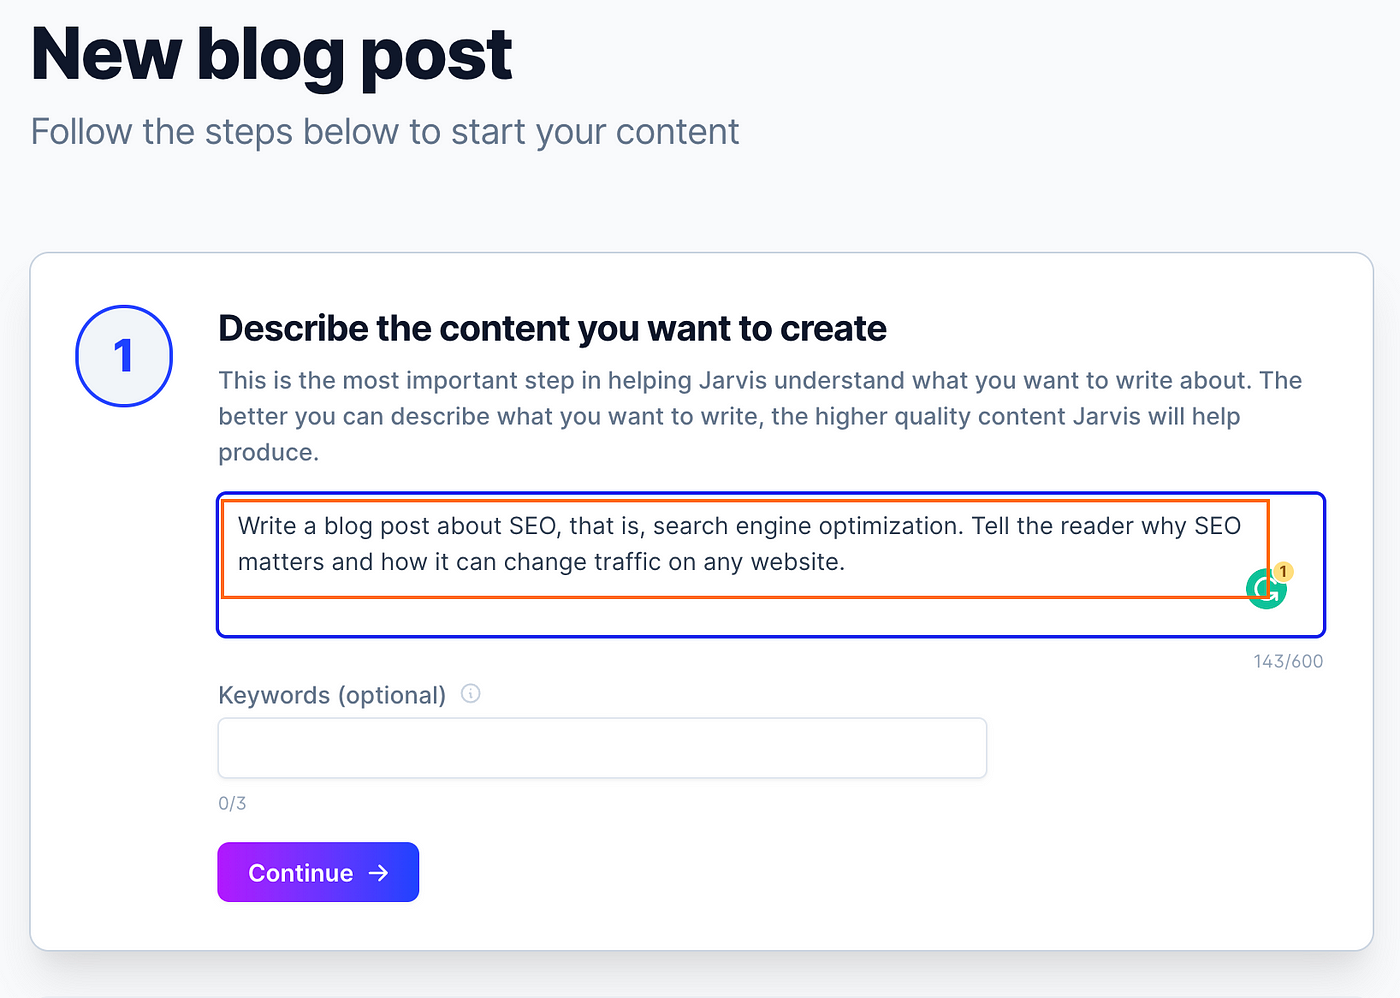
(As you can see, you can also specify the number of keywords for the post. We are going to skip this part for now.)
Once you have described your content to Jasper, click “Continue”.
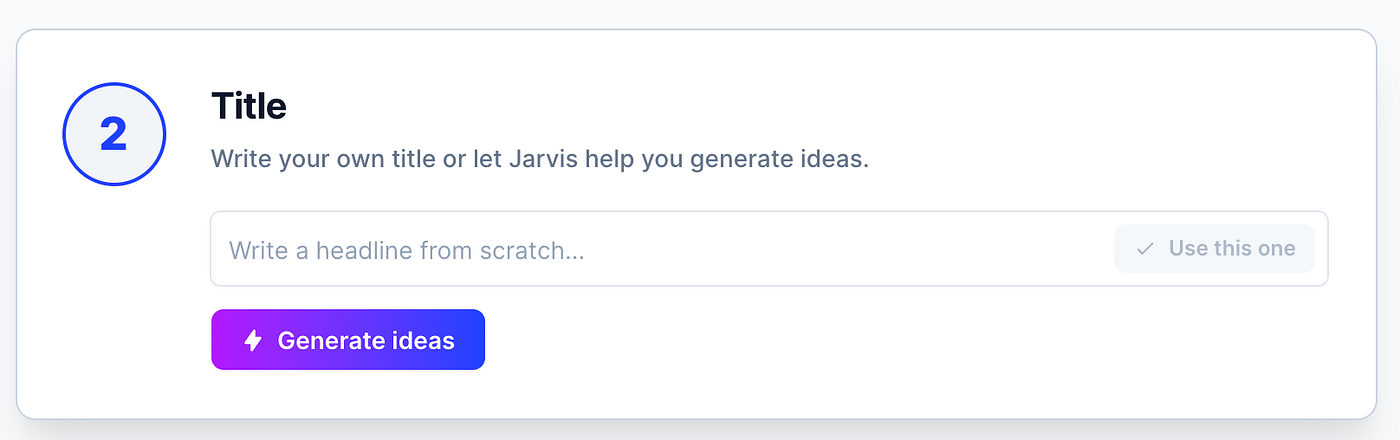
2. Generate Post Title
Now that you have the content description, let’s generate a title.
You can either use a blog post title of your own, or you can use Jasper to generate one.
Let’s ask Jasper for some title ideas by clicking “Generate ideas”.
This takes one or two seconds after which you see a bunch of suggestions.
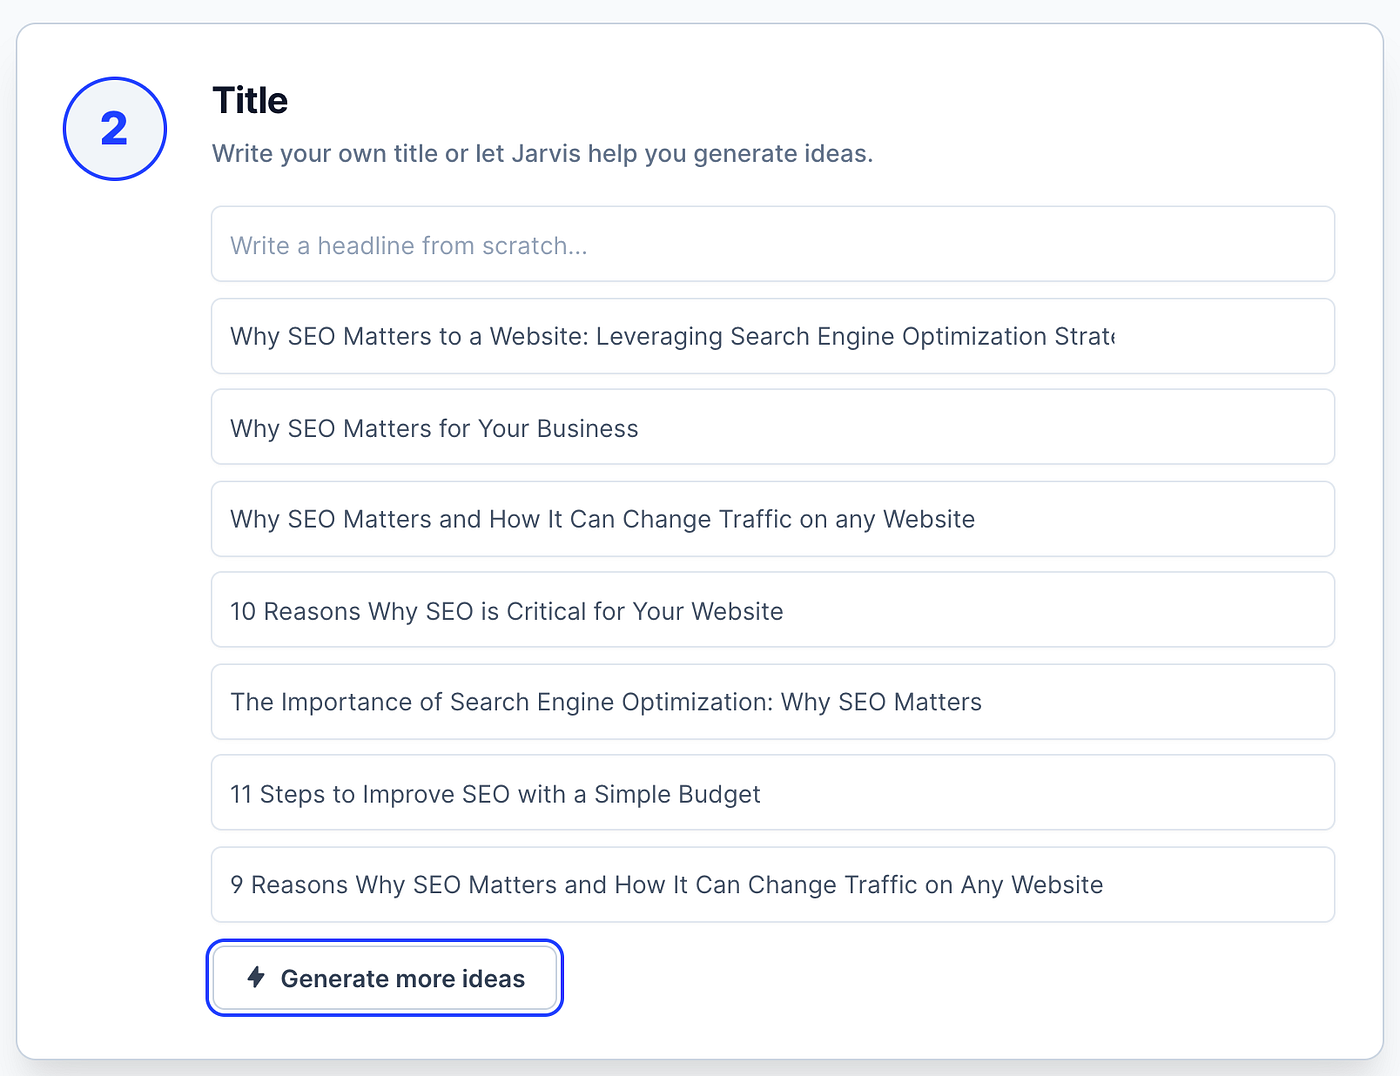
The third option “Why SEO Matters for Your Business” sounds cool.
To choose it, click “Use this one”.

By the way, if none of the above suggestions look good, feel free to generate more titles by clicking “Generate more ideas”.
Next, let’s choose an intro for the blog post.
3. Blog Post Intro
Now it is time to generate an intro for our article.
To make Jasper generate intros, click “Generate ideas” in the Intro paragraph section:
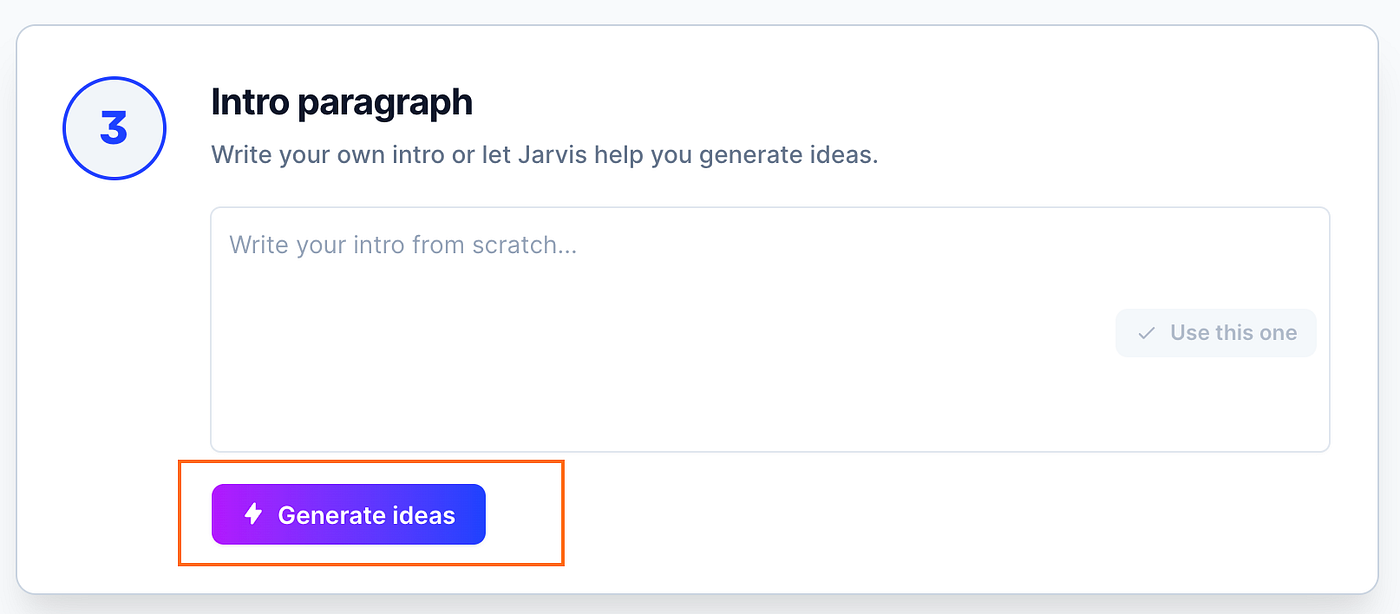
(Notice that you can also write your own intro if you wish to.)
Generating intro results in a number of intros suggested by Jasper.
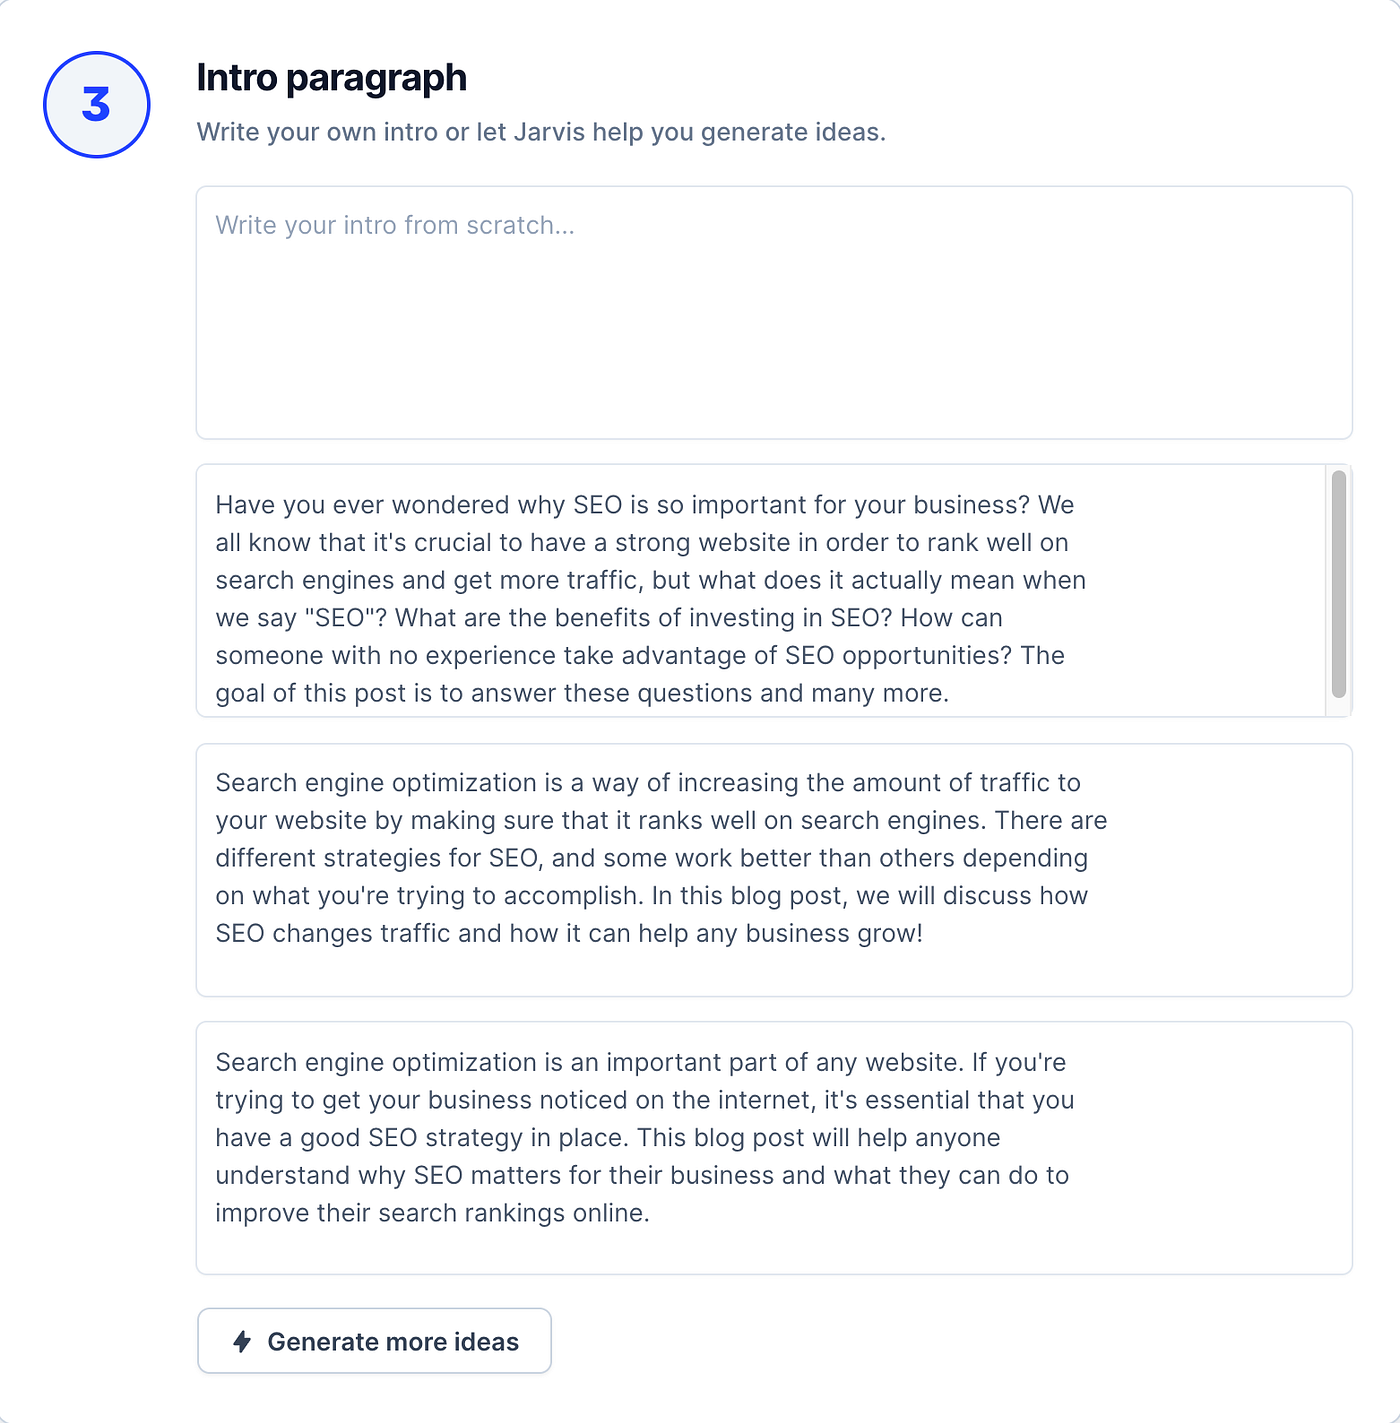
Meanwhile, all of these suggestions look great, let’s stick to the second one.
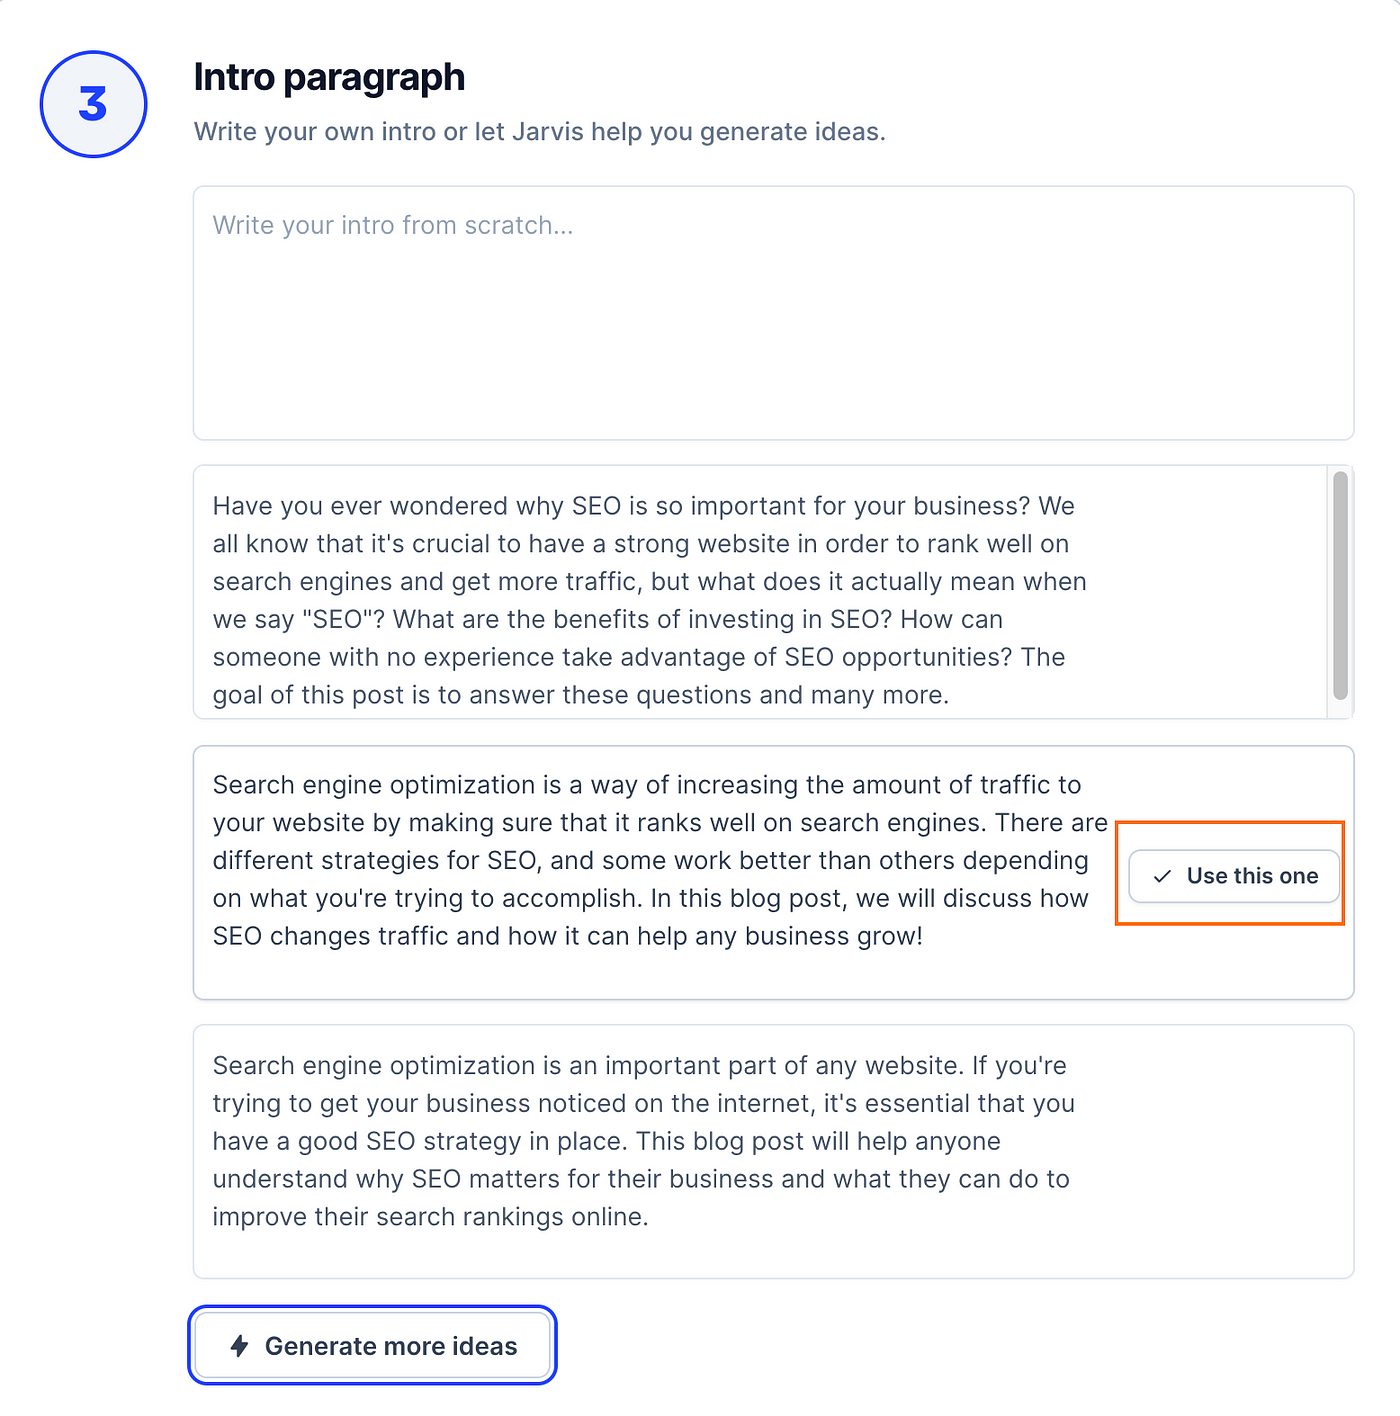
And this completes the setup phase of our article.
Click “Open editor” to start generating the actual blog post content.

This opens up the Jasper editor with the content specified in the setup phase.

The next step is to create a blog post outline.
4. Blog Post Outline Using Jasper
With the title and introduction in place, let’s write a blog post outline.
If you have a specific outline in mind, feel free to stick with that. If you don’t, you can let Jasper generate one for you.
To make Jasper generate the outline, write something like this into the editor:
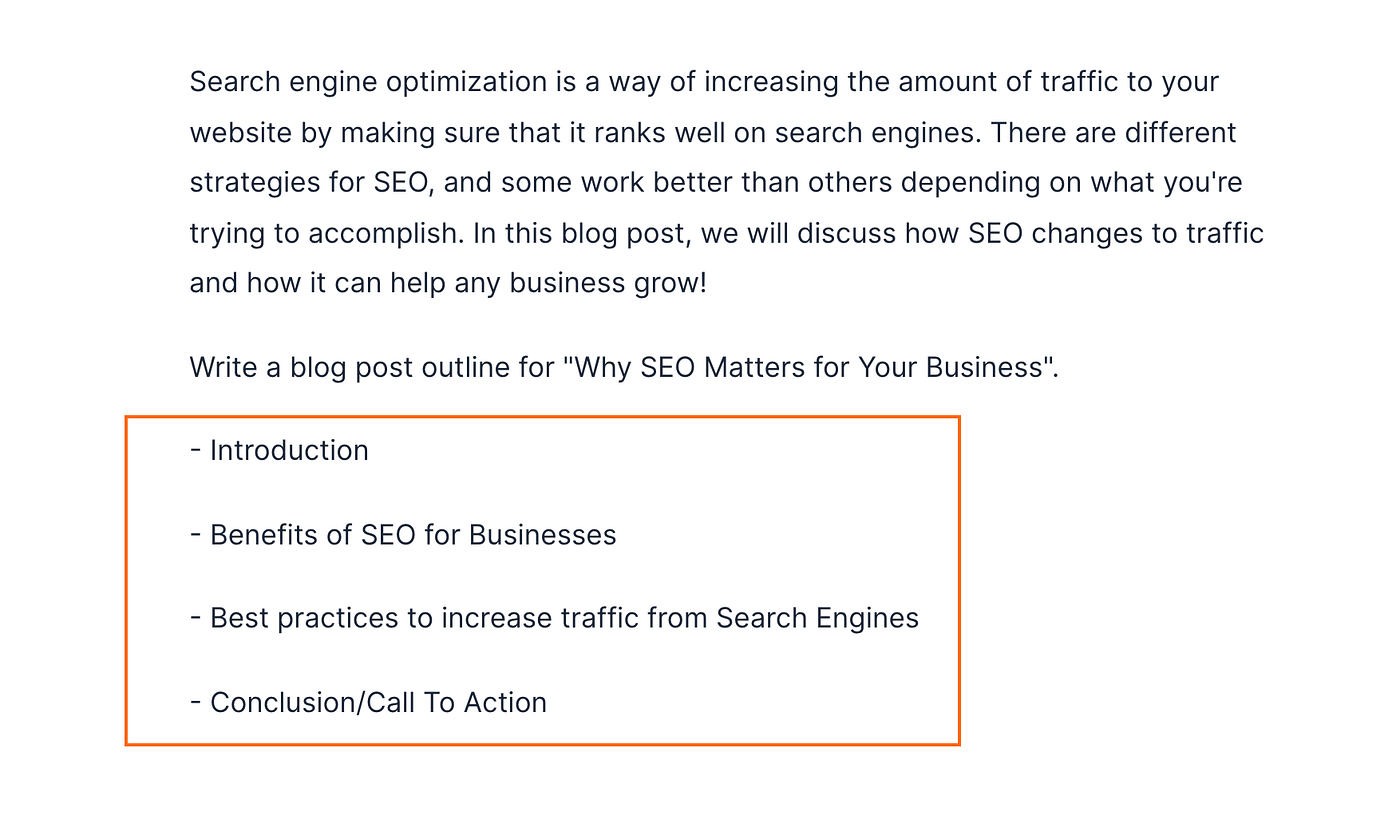
Write a blog post outline for “Why SEO Matters for Your Business”.
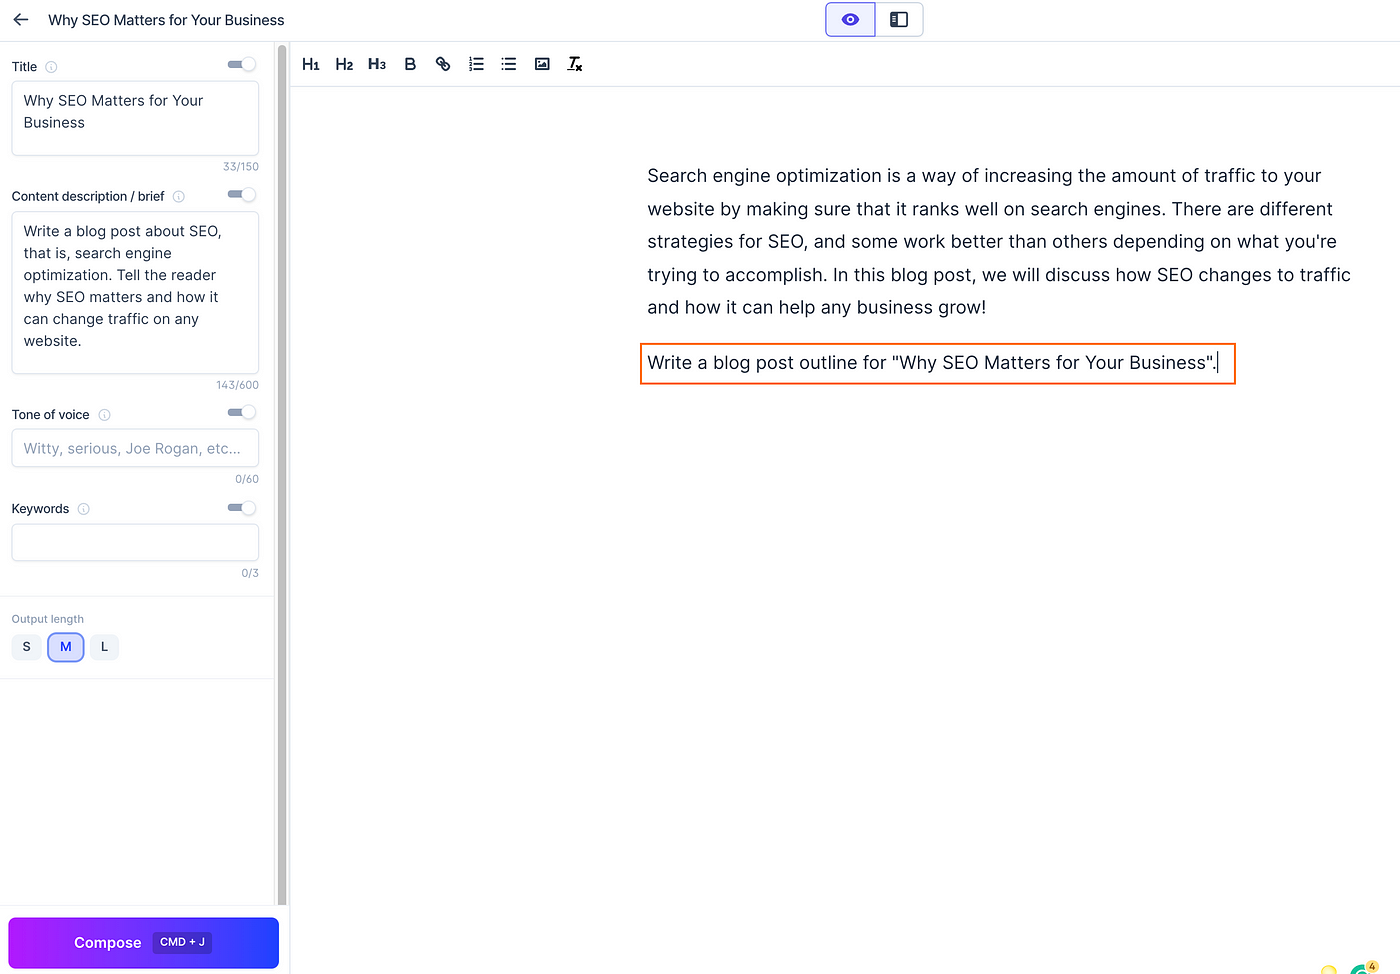
For the next step, make sure your cursor is at the end of the command! This is because Jasper always generates text where the cursor is.
Now click “Compose” down on the left-hand side and let the magic happen.
For me Jasper generated the following outline:
- Introduction
- Benefits of SEO for Businesses
- Best practices to increase traffic from Search Engines
- Conclusion/Call To Action
It is that easy!
Now, before we generate content for each section in the outline, we need to create the conclusion paragraph.
5. Generate the Conclusion Before the Actual Content
Before writing out the blog post, let’s write a conclusion.
Similar to the previous steps, you can let Jasper generate the conclusion.
But why generate a conclusion before writing the post?
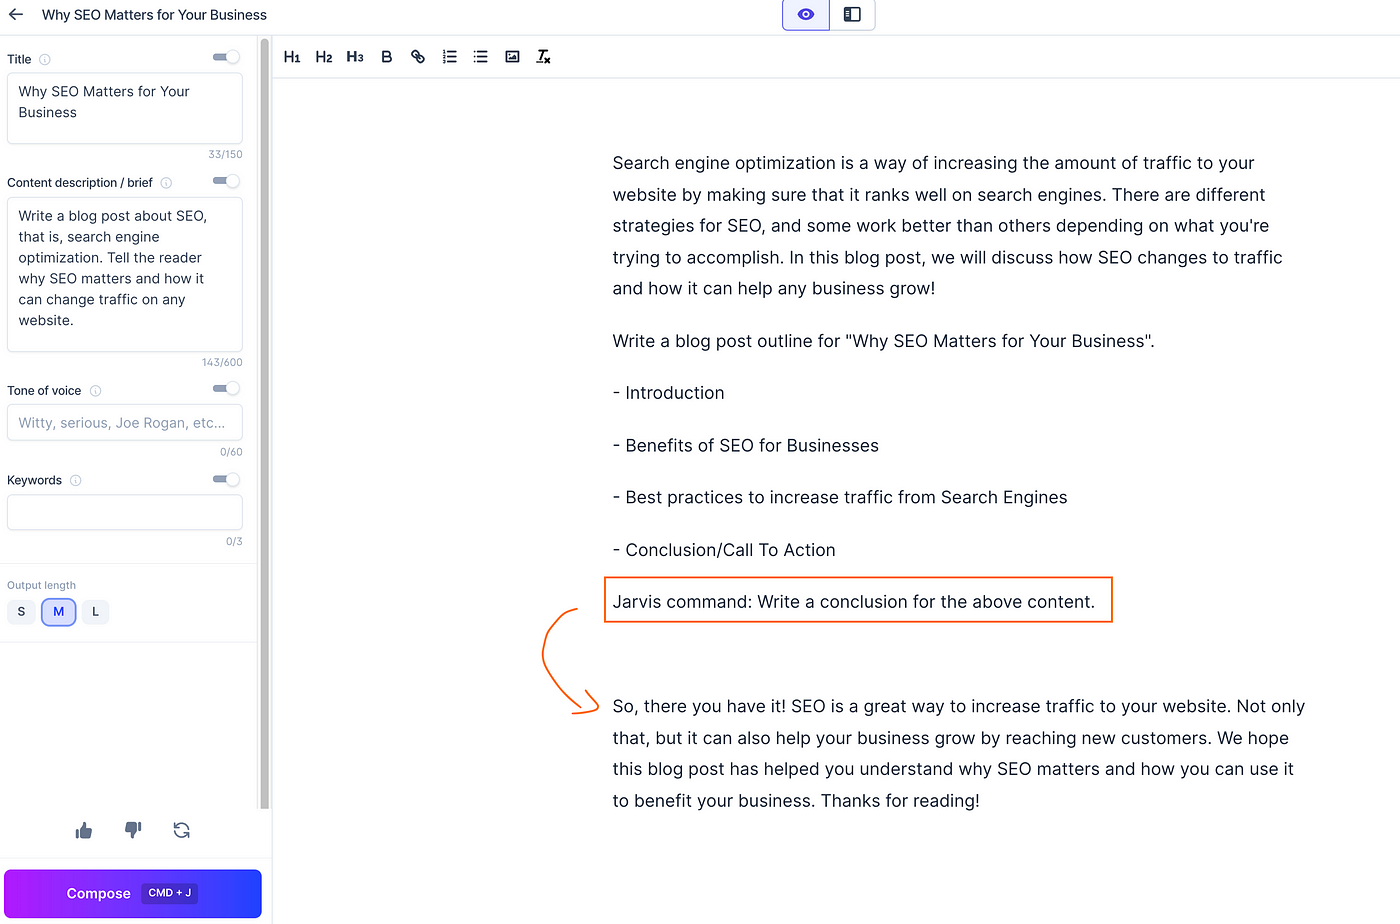
Jasper can only look back on so many characters. If we wrote the conclusion for a 10 000 character blog post, Jasper would only be able to use the last 3000 characters to form the conclusion. This would make our conclusion incomplete.
With this in mind, let’s write a conclusion for our post using the Jasper command.
So easy and so cool!
Now we are ready to jump into producing the actual content for the post.
6. Generate the Blog Post Content
So far you have used Jasper to generate a nice structure for the blog post. This includes:
- Title
- Intro
- Conclusion
Let’s quickly have a look at the left-hand side of the editor before generating the rest of the post.
The Editor Bar on the Left
Take a look at the left side of the Jasper editor. There is the content description and the title.
It is important to realize that you can modify anything here at any time during the writing process.
For example, if you write a specific section in your blog post, you can modify the content description to more accurately describe that section.
Another thing worth noticing is the toggles below each box.
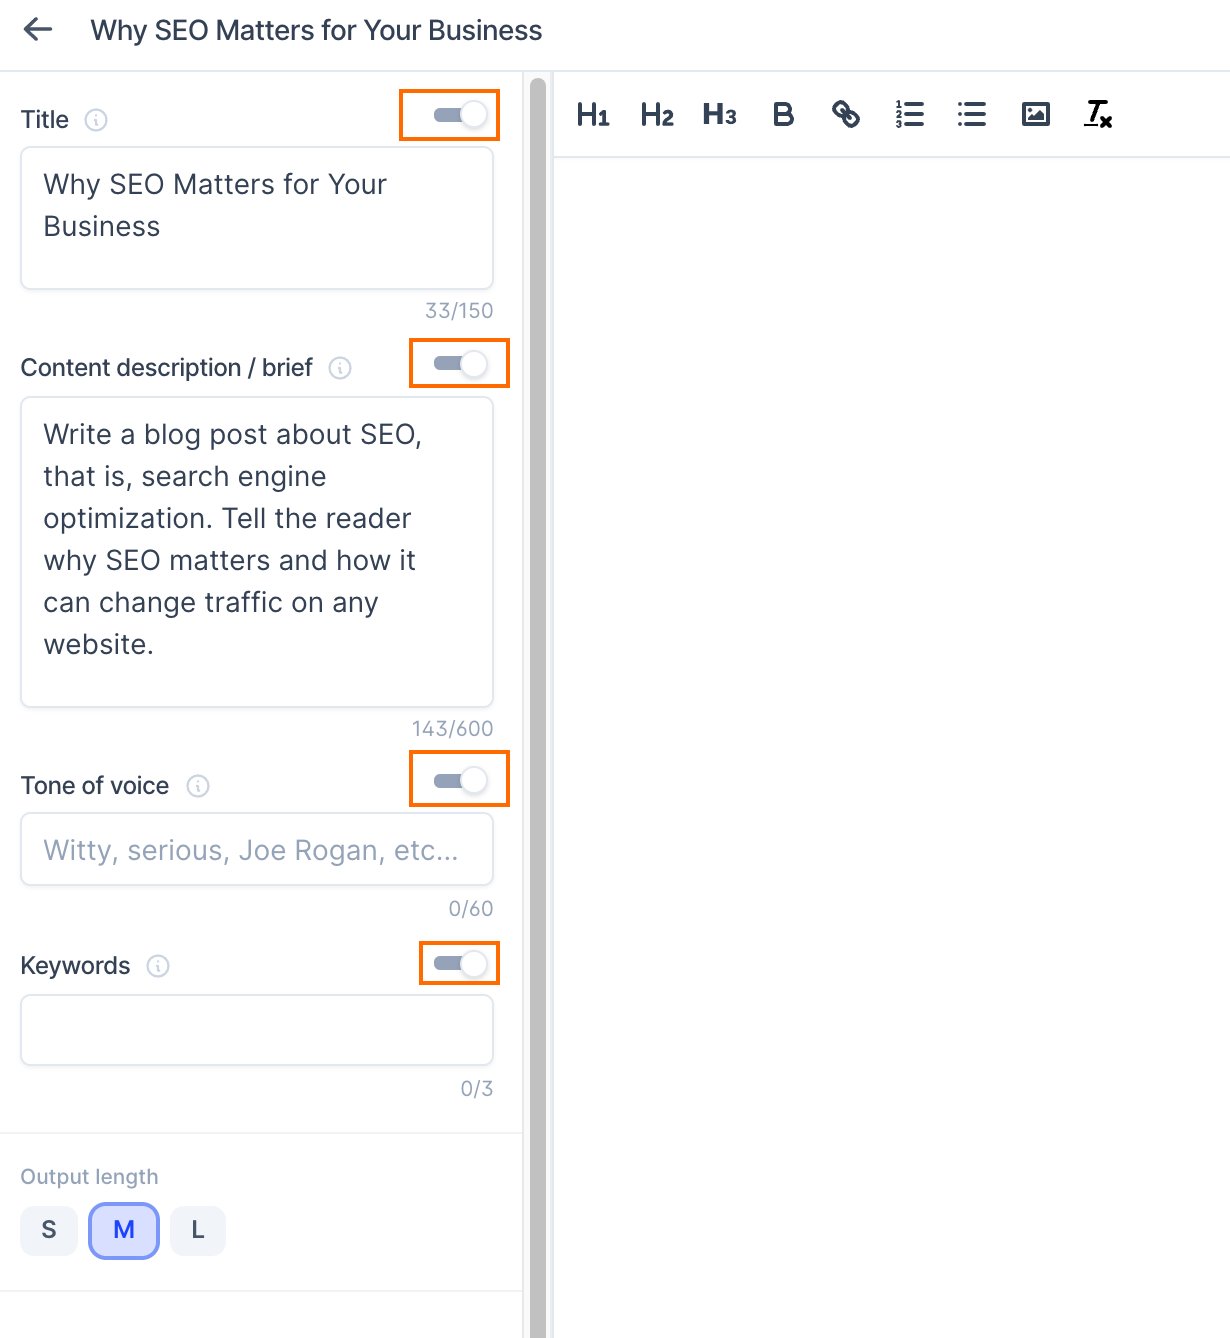
If you switch one of these toggles off, Jasper disregards the content on the box altogether.
However, in this guide, I am not going to touch the toggles or change the content description.
Generate the Blog Post with Jasper
Finally, let’s generate content for each section in our blog post.
As you remember, Jasper suggested the following structure for our blog post:
- Introduction
- Benefits of SEO for Businesses
- Best practices to increase traffic from Search Engines
- Conclusion/Call To Action
We already have Introduction and Conclusion in place, so let’s manually remove the Introduction from the list and add the Conclusion heading where it belongs to.
Here is how the article looks after these small manual tweaks:
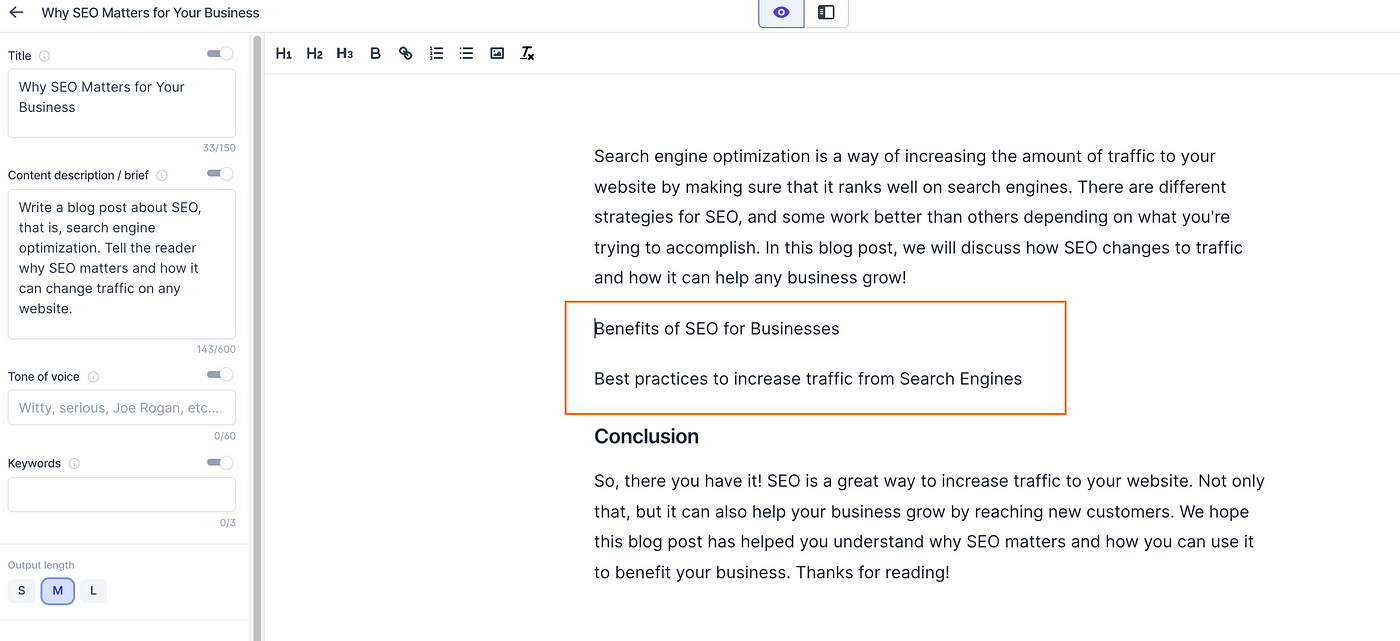
Now we have two sections that need to be filled in by Jasper that form the actual content for the post.
To do this, you can ask Jasper to write introductory paragraphs for these two subheadings.
For example:
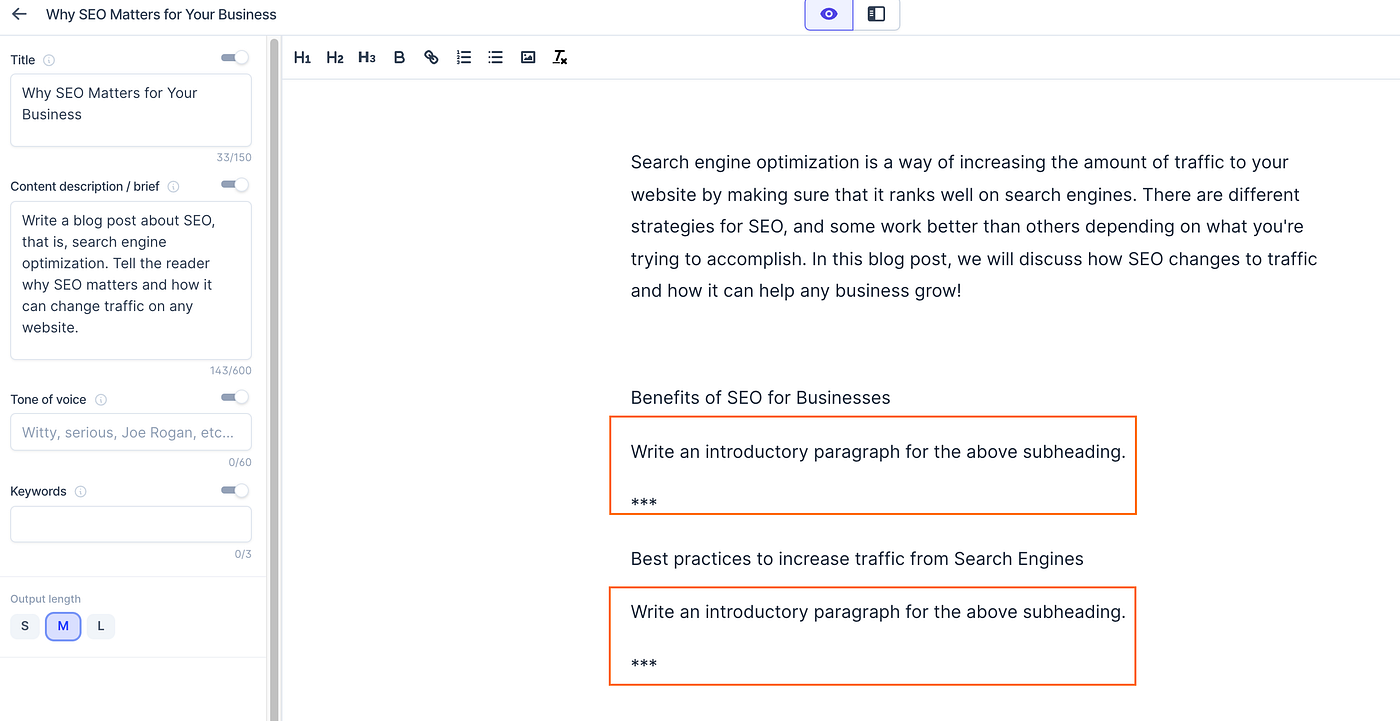
Here we tell Jasper to write content about the topic in the above subheadings.
The *** operator tells Jasper to not repeat anything before the three asterisks. This operator is not mandatory, but sometimes it makes Jasper do a better job.
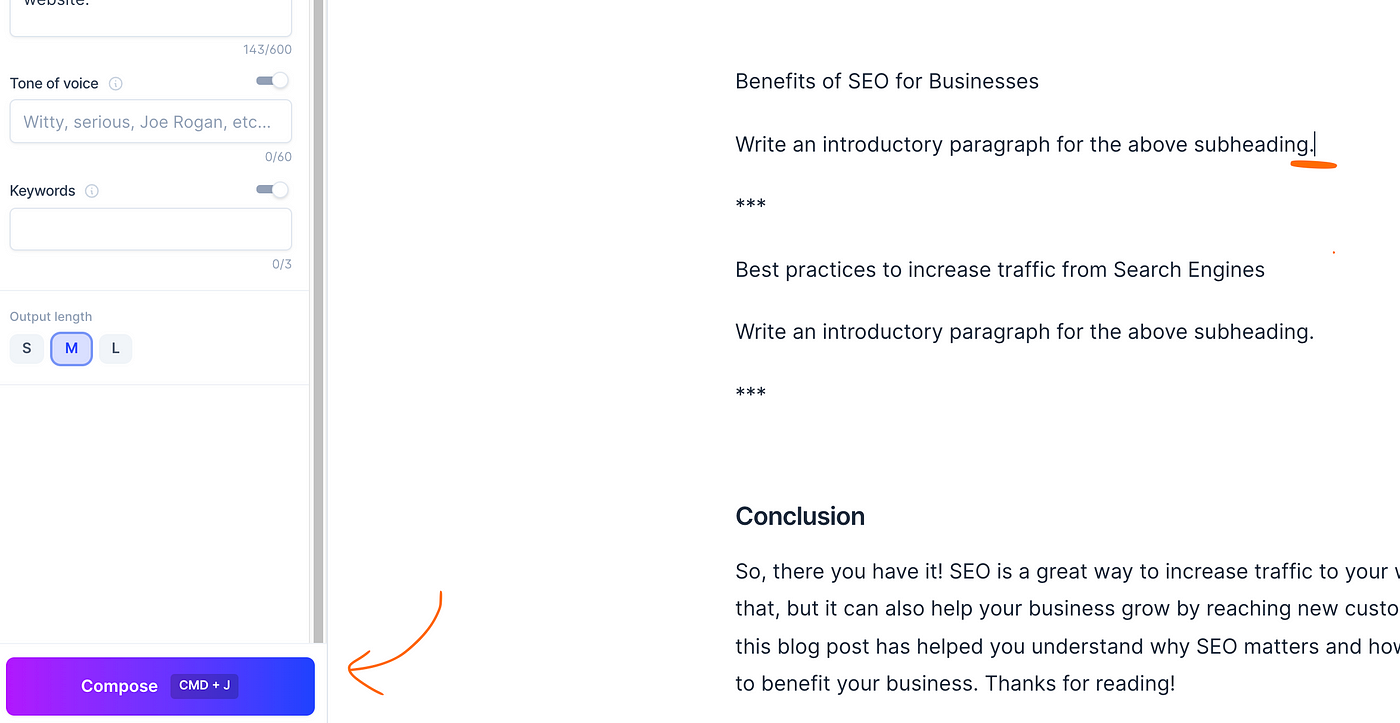
Tip: Sometimes Jasper starts to repeat itself. To prevent this, add *** to make it stop.
Anyway, let’s make Jasper write the content for these sections. To do this, add your cursor at the end of one of the commands and click “Compose”.
Now Jasper writes an introductory paragraph for our first subheading.
Here is what the result looks like.
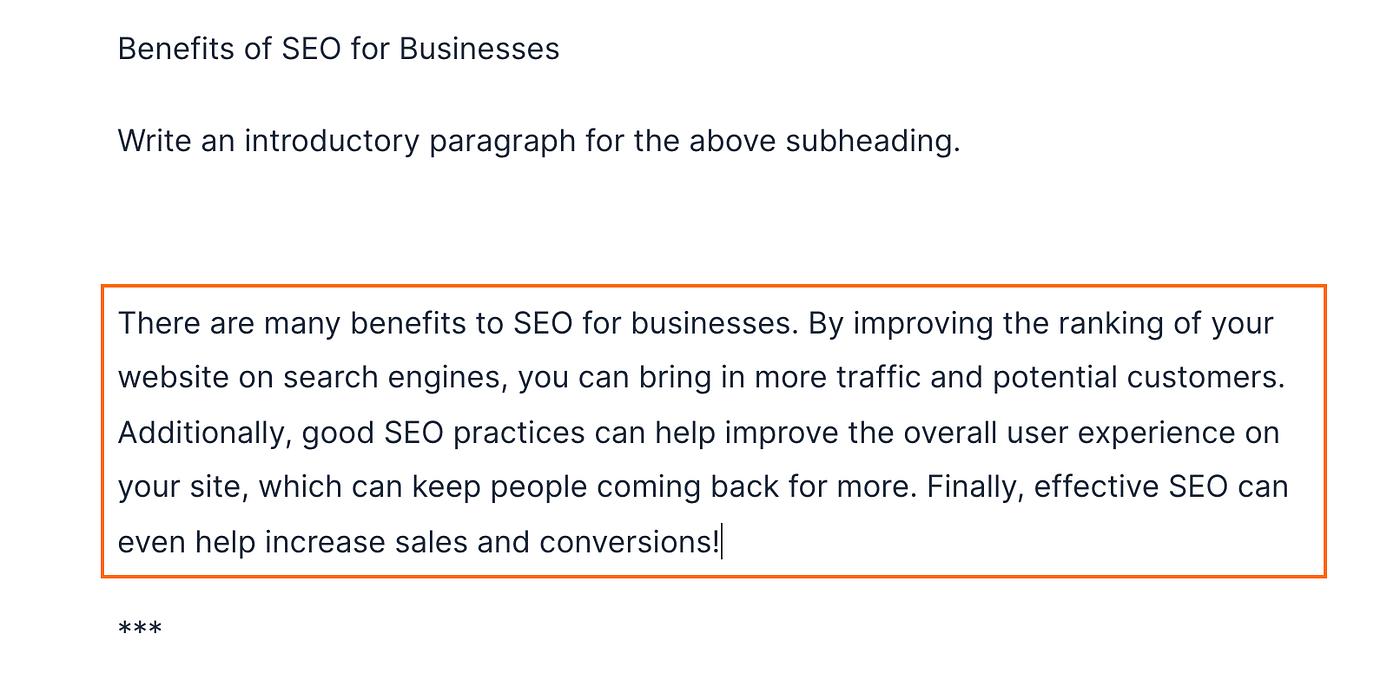
If you are pleased with this output, leave it as is.
You may also manually modify the text, generate more content by clicking “Compose” again, or erase the whole section.
Next, let’s go to the second chapter and compose an intro to it:
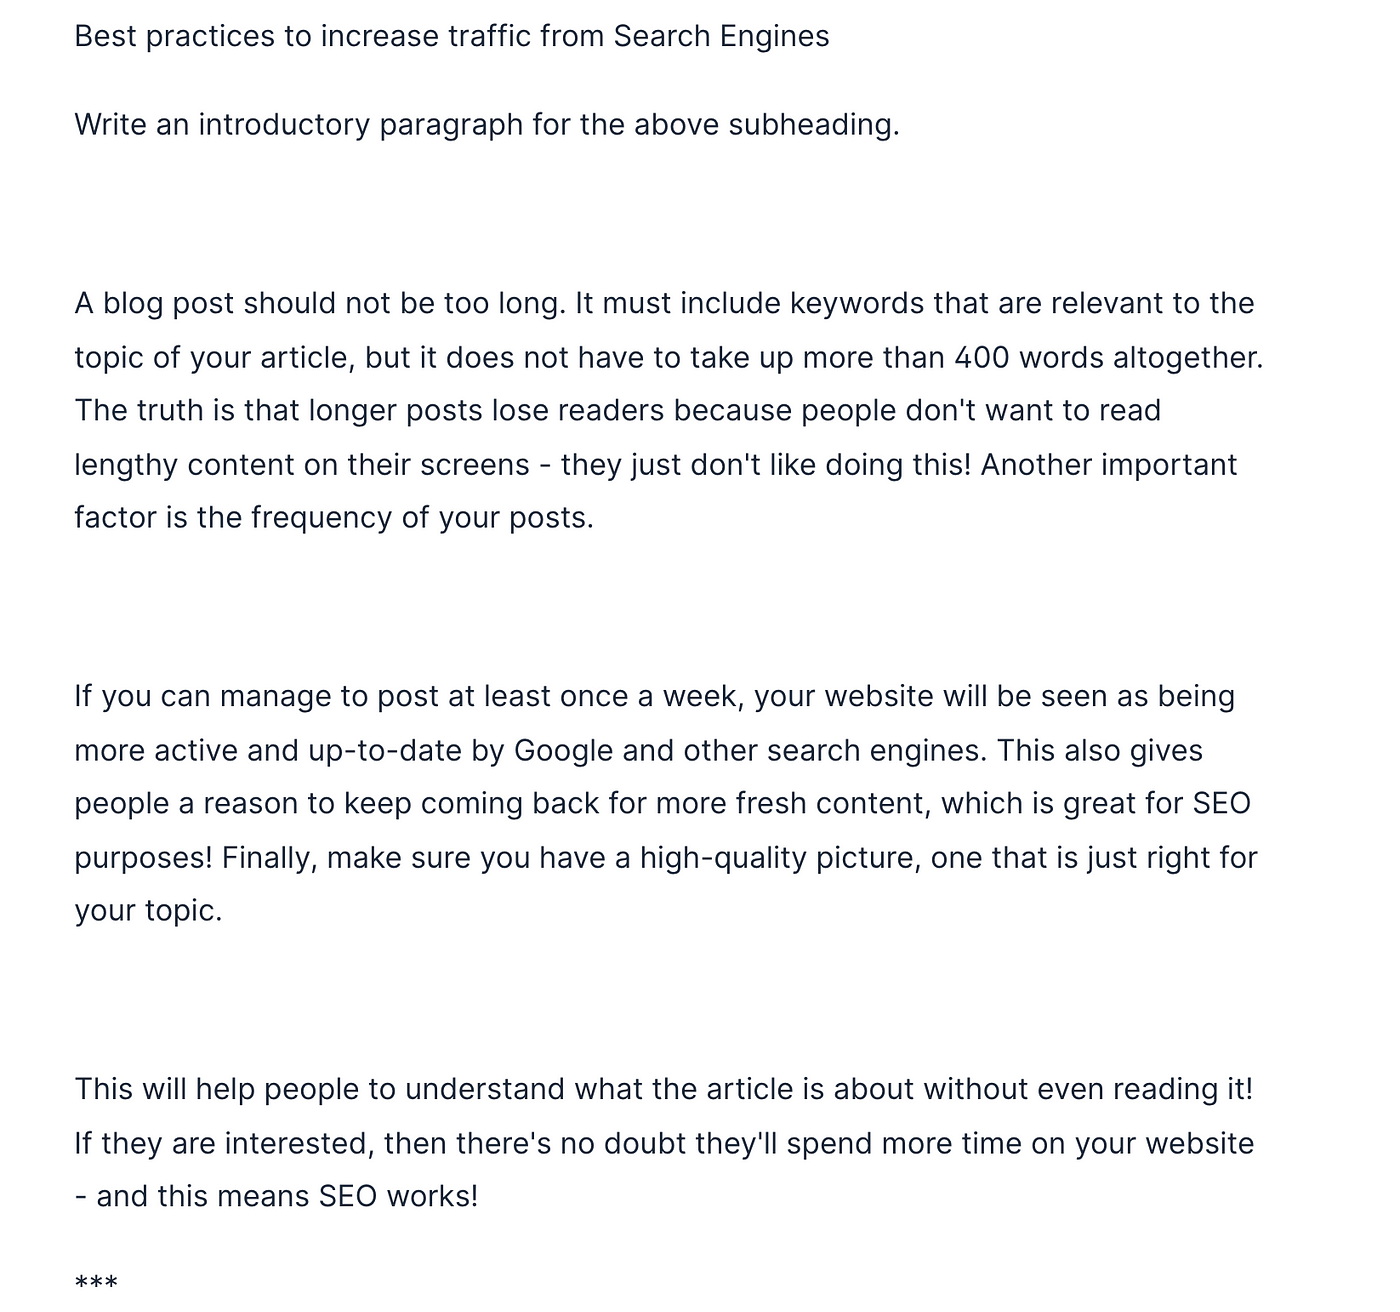
This time I composed three times to get more content. As you can see it looks pretty good!
Notice you can tell Jasper to write text in any format, not just regular sentences.
For example, you can ask it to write a bulleted list of important SEO factors:
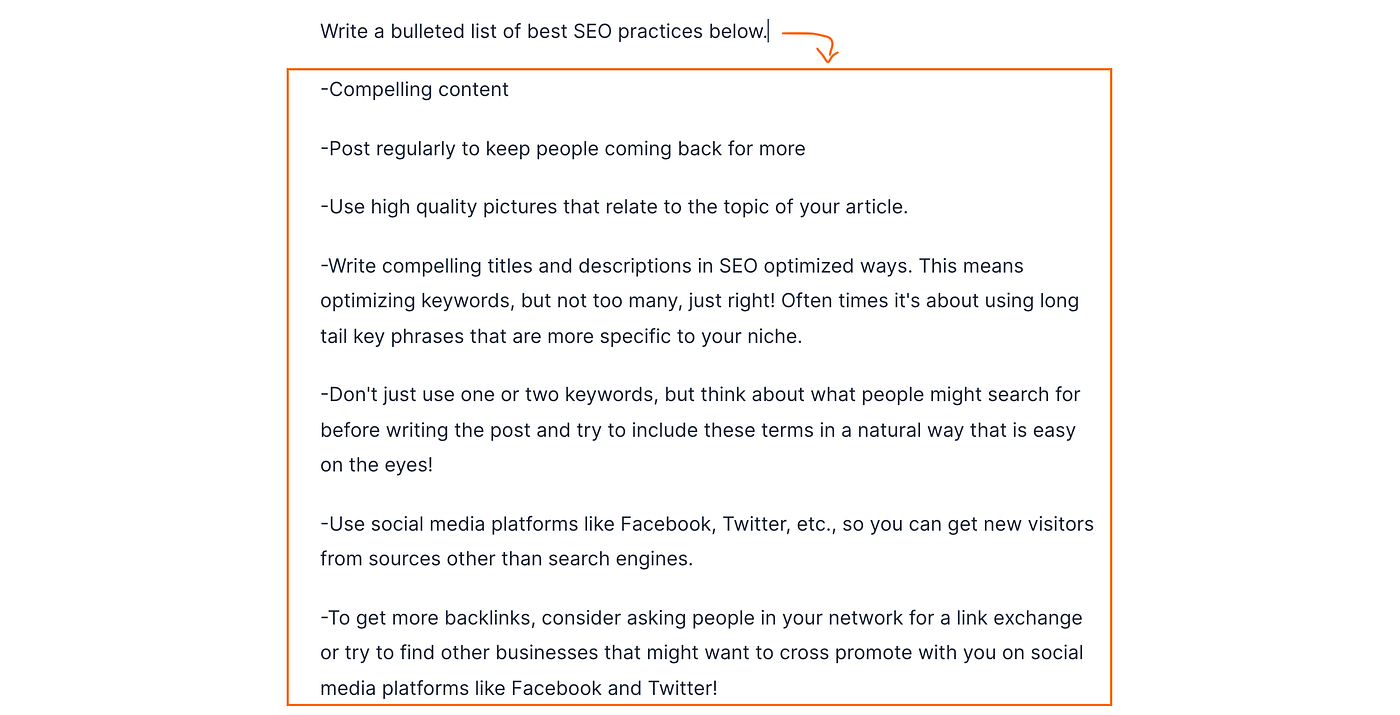
Wonderful!
This completes the AI-written blog post.
Before publishing the post, let’s make some styling edits.
- Remove the Jasper commands and ***’s from the content.
- Format the post. For example, you can convert header paragraphs to actual headers with the editor.
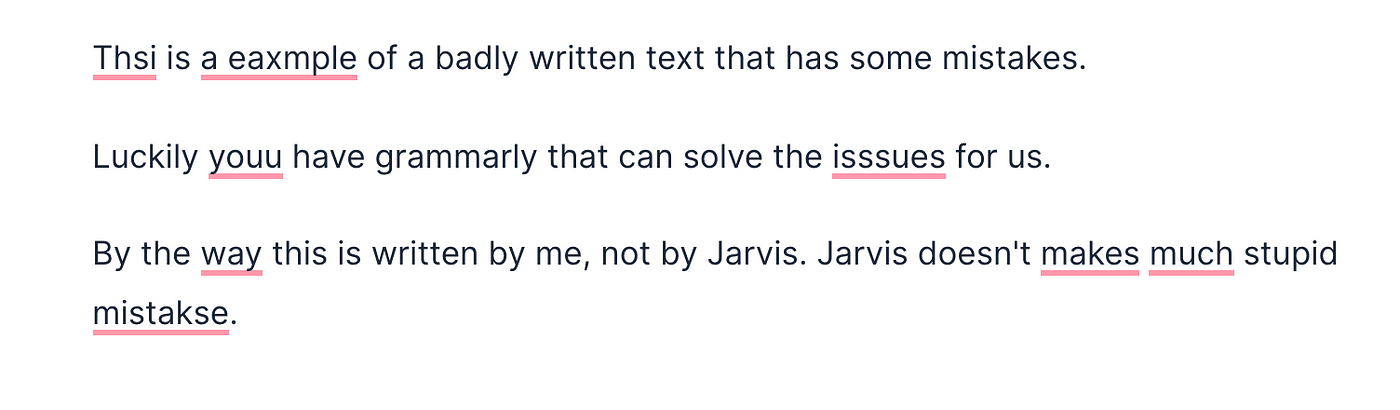
- Fix the small grammar errors. To fix these, enable Grammarly for free or just go through the post quickly yourself.
- Also, it is highly recommended to add images to any blog post to make it look more appealing. You can add images for free using an image bank such as Unsplash.
After completing these steps your post is ready to go live!
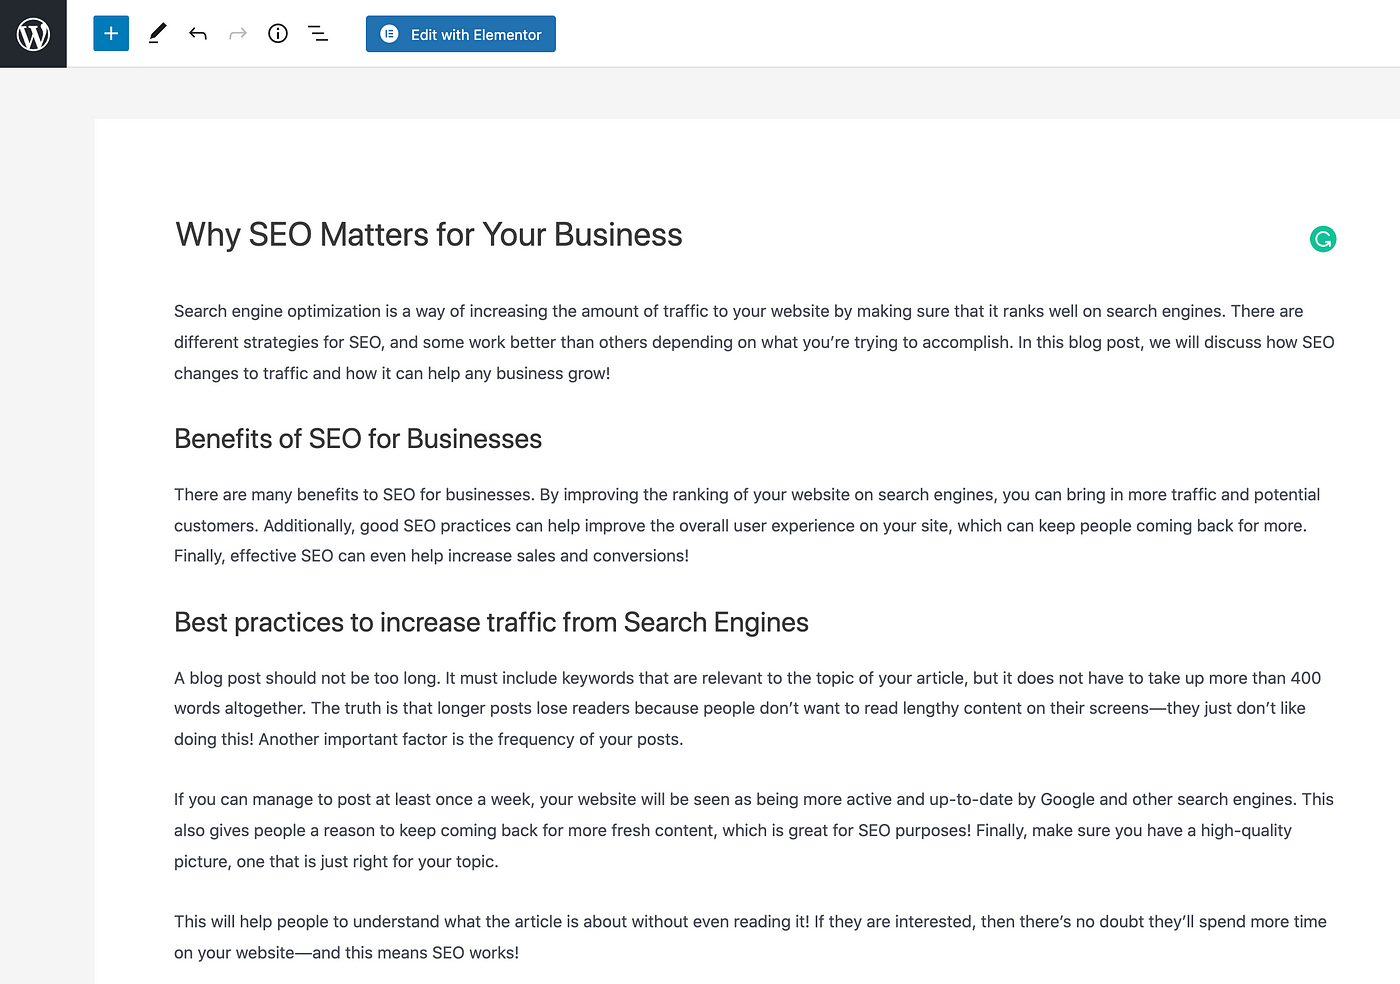
Here is what the final result of our example post on SEO looks like.
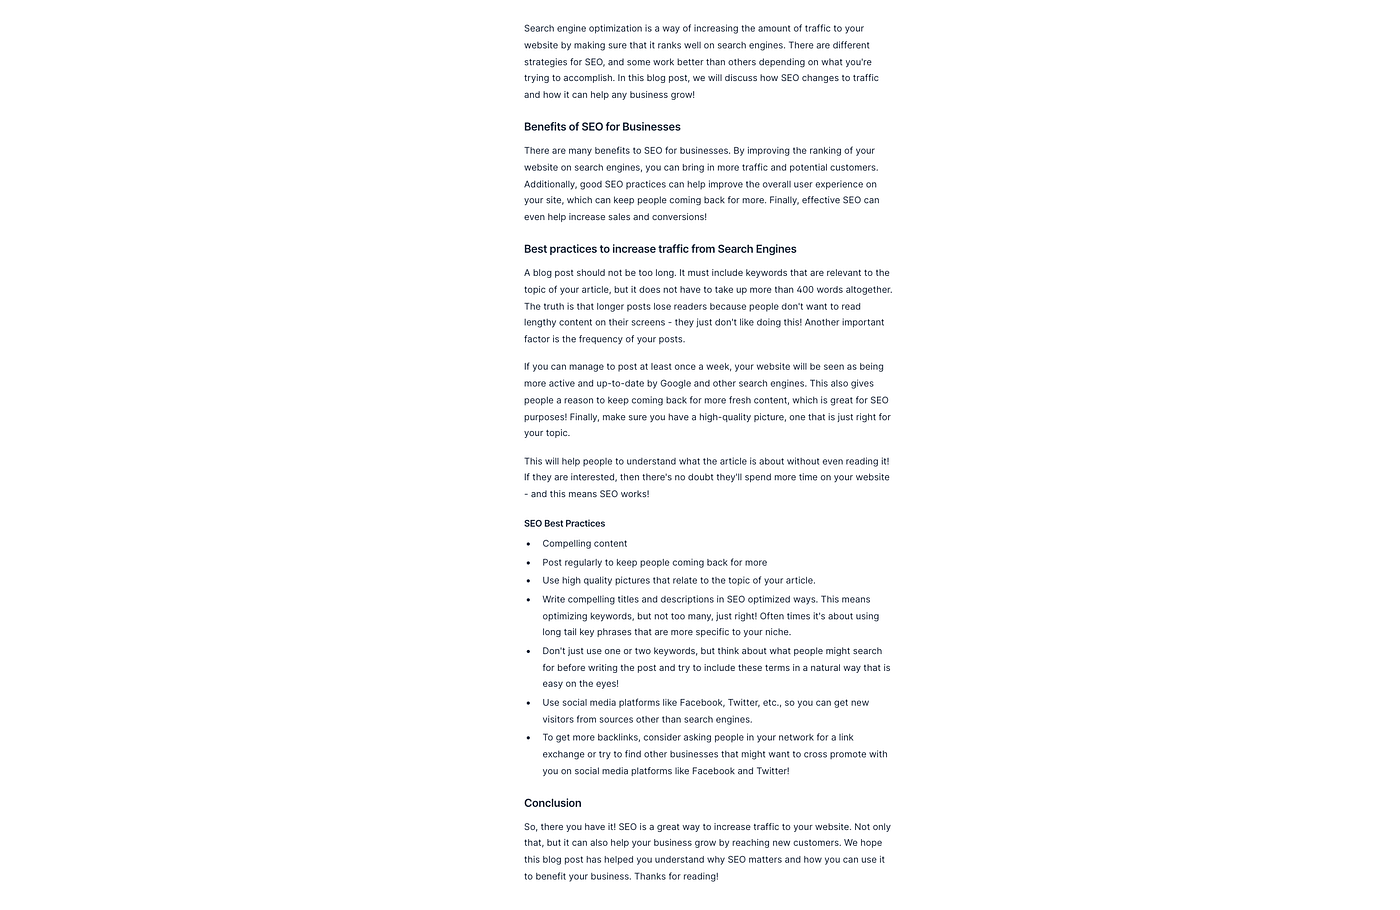
So there you have it! 100% original and search engine-friendly content written by an AI writing assistant.
This post ended up being 500 words in length with only 10 minutes of effort.
7. Publish Your Content
After Jasper has done all the hard work it is your time to enjoy the benefits by publishing the content.
Moving the post to another platform is easy—copy-paste the content to a platform of your choice.
For example, on Medium, you can start a new story.

And copy-paste the content directly from Jasper to Medium.
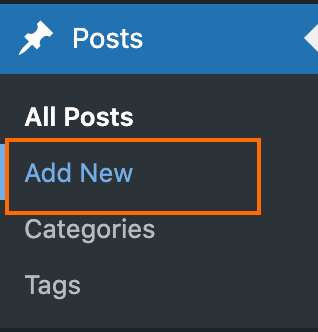
The same goes for WordPress. Create a new post.
Copy-paste the content from the Jasper editor to your blog post.
This completes the tutorial.
Impressive stuff, isn’t it?
Make sure to try Jasper for free!
Summary
Artificial intelligence (AI) is making its way into the blogging business.
Today you learned how to use the latest advancements in AI to write a blog post.
I believe that in a couple of years not using an AI writing assistant automatically drops you out of the competition.
The year 2022 is a perfect time for you to jump on the AI train.
As a blogger, the best way to do this is to start using AI-assisted writing tools, like Jasper.
In this article, you learned how to use Jasper.ai to write 100% original, well-thought, and search-engine-friendly content in a matter of minutes.
I hope you enjoy it. Thanks for reading.
Happy writing!