
To turn yourself into a full-time blogger, you have to be good at monetizing your blog. One of the predominant approaches to monetizing a blog is by displaying ads.
Showing ads is great because it allows for a passive income stream. What could be better than making money while you sleep?
In the past, the de-facto ad network for showing ads was Google AdSense. Thanks to the rapid developments in ad serving, there are more lucrative alternatives.
Choosing the right type of ad network is crucial. Some ad networks may litter your blog with ads that also slow your site down. These ads make the user experience bad.
Today I will discuss one of the best Google AdSense alternatives, Newor Media. Newor Media is an example of a high-quality ad network. Their main focus is on:
- Maximizing earnings
- Keeping the user experience good
- Keeping the number of ads minimal
Today you learn what makes Newor Media such a great alternative to AdSense. This is a comprehensive review that answers all your questions regarding Newor Media. To make it effective, you will also learn how to start running Newor Ads on your site.
Disclaimer: I’m an ad partner in Newor Media. This post contains affiliate links at no cost to you.
What Is Newor Media?
Newor Media is a Google-approved ad management company. Newor Media uses a strategy called header bidding to auction ad units.
Newor Media’s main goal is to find the highest-paying advertiser to show ads to your visitors.
Newor Media is commonly treated as the best alternative to Google AdSense. Newor earnings are typically much higher than with AdSense. Yet your site speed and user experience remain almost the same.
Before I show you how to run Newor Ads on your site, let’s first dig deeper into the details of how Newor Media works.
Header Bidding to Maximize Revenue
Newor Media runs header bidding to auction ad space.
If you are new to the ad game (like I was), this might ring no bells.
In layman’s terms, the ads are placed on your site using this strategy:
- A random visitor opens up your web page.
- Newor Media sets up a quick competition. In this competition, companies compete against each other trying to get their ad shown to your visitor.
- The company that pays the most is the winner. As a reward, their ad is shown to your visitor.
The process is exactly like an auction. A bunch of companies bid against each other to win the auction. In this case, Newor Media is the host, and the auctioned products are ad space on your blog.
But how long does this process take? Shouldn’t the ad be displayed immediately to the visitors?
The header bidding auctioning is an automated process. It takes place in no time. The ads load before the page even loads.
Newor Media partners with all the major ad networks and companies. Their goal is to make sure your blog’s ad space is auctioned to as many companies as possible. The more bidding companies there are the higher the earnings.
Before Header Bidding Was a Thing…
Back in the day when header bidding wasn’t a thing, your ad space went to the first one who was willing to pay for it. Even if there was an entity willing to pay 10 x more, the first offer still won.
This strategy was much less profitable for the bloggers.
But thanks to the header bidding strategy, bloggers get paid more than they deserve.
Header Bidding Improves User Experience
Header bidding is also a great strategy because it’s lightweight for your website.
This is because all the ad units on your page are powered by a single script. This positively affects the user experience of your site because the load speeds are quick.
This wouldn’t be the case if there were multiple scripts instead of just one.
Newor Media Ad Support
Newor Media supports a broad variety of ads. These include:
- Video Ads
- Native Ads
- Web Ads
- Interstitial Ads
- Sticky Ads (for headers and footers)
- Rich Media Ads
Once you are in the program, you can choose what types of ads you want to show your audience.
Starting with Newor Media: A Step-by-Step Guide
To start using Newor, you don’t need to have any experience with Ads. You don’t need to possess any coding experience either. All the heavy lifting is done for you.
To apply as a Newor Media Partner, you need at least 30,000 page views per month to your site. This is the step-by-step process on how to apply and set up Newor Media Ads on your site.
- Apply for the Newor Partner Program.
- Wait for the application to be accepted/rejected.
- Ensure your site is Google AdSense compliant.
- Setup a Google Ad Manager account.
- Wait for Google to accept your Ad Manager Account (also on Newor’s side)
- Create (or update) an ads.txt file for your site.
- Choose ad units with the help of your account manager.
- Place the ad units on your site with Ad Inserter.
- Wait for the demand to ramp up.
Although you can use Newor’s own setup guide, there are quite a few tips worth checking. For example, there is no one-size-fits-all solution for inserting ads into all your blog posts.
By the way, you can follow this guide no matter which platform you used to build your website. The ad insertion phase works for WordPress blogs only, though.
1. Apply for Newor Media Partner Program
Before you can start displaying Newor Media ads on your site, you need to apply for their partner program.
To apply, head over to newormedia.com and click “Partner with Us”.
Before sending the application, you need to make sure your site is eligible to join the program. There are two requirements:
- 30,000+ monthly page views.
- No borderline content (sex, drugs, guns, gambling)
2. Wait for the Approval
After sending your application, you need to wait for a couple of days for the review process to complete.
Don’t be sad if you don’t get accepted right away! Newor Media is a quality ad manager and they want to make sure to choose partners that make a good fit. They won’t choose blogs that wouldn’t make money. If the application was rejected, you can build a bigger audience, or try another ad network, such as Ezoic or AdSense.
But if you got accepted, congrats!
It’s time to start taking steps towards showing ads on your site.
As the first step, you will be assigned an account manager. Your account manager sends you a link to your ad management dashboard. This is where you can control ads and track their performance.
Make sure to disable any ad-blocking services to access your dashboard! Also, from now on it makes sense to disable ad blocks on your own blog too.
3. Ensure Your Site Is Google Compliant
Before you can show ads via Newor Media, your site has to be Google compliant.
As a Google advertising partner, your website must be accepted by Google before showing ads on it.
Make sure your website follows the Google ad compliance guidelines.
4. Setup a Google Ad Manager Account and Wait for Approval
When you access Newor Media dashboard for the first time, it prompts you to create a Google Ad Manager account.
To partner with Newor, you need to have a Google Ad Manager set up. When you create an Ad Manager account for your site, it will take a while for Google to approve it.
Google first has to approve your Ad Manager account. Besides, Google also has to review your website on Newor’s end. This can take a couple of days.
It will probably take a week from completing the first step to get here. So be patient!
6. Create an Ads.txt File
Once Google has approved your site and ad account, your Newor account manager help you obtain an ads.txt file.
This is a text file that lists all the advertisers you’ll be working with via Newor.
You don’t have to worry about anything else, except for adding the ads.txt file to your site. This means it should be accessible to anyone via yoursite.com/ads.txt.
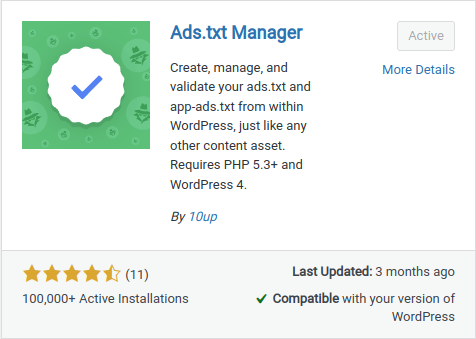
If you are using WordPress, you can install an Ads.txt Manager plugin.
When you have installed and activated the plugin:
- Go to Settings > Ads.txt. This opens up an editor with a big blank text area. This is your ads.txt file.
- Now copy the ads.txt file you received from Newor Media and paste it to the editor.
- Scroll down to the editor page and click “Save changes”.
- Go to yoursite.com/ads.txt. You should see the lines you just copy-pasted appear there.
Good! Now you have successfully set up an ads.txt file for your site.
In case you are wondering, ads.txt is a security mechanism for advertisers. This file lists all the trusted advertisers. It ensures you don’t end up working with illegitimate advertisers by mistake.
7. Choose the Newor Media Ad Units
As the next step, your account manager asks you:
- How many ad units do you want?
- What are your ad size preferences?
If you are a beginner in advertising, I recommend going with the default sizes and the number of units. That’s what I did!
However, if you have a specific number and ad sizing in your mind, feel free to order those.
8. Place the Ad Units on Your Site
After agreeing upon the number of ad units and their size, your account manager will order you the ads. This can take a day or two.
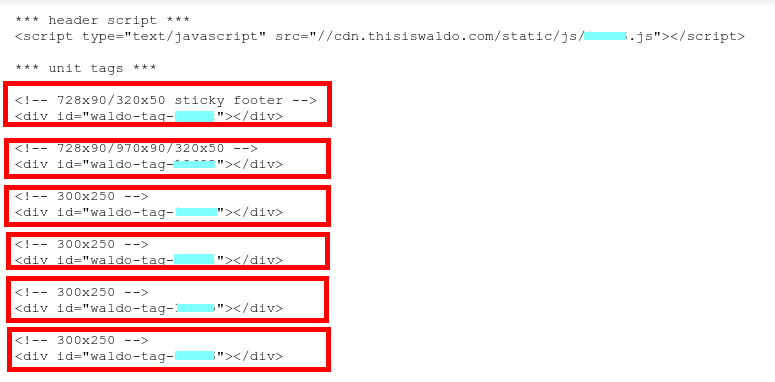
Once the ads are ready, your account manager sends you a file that looks something like this:
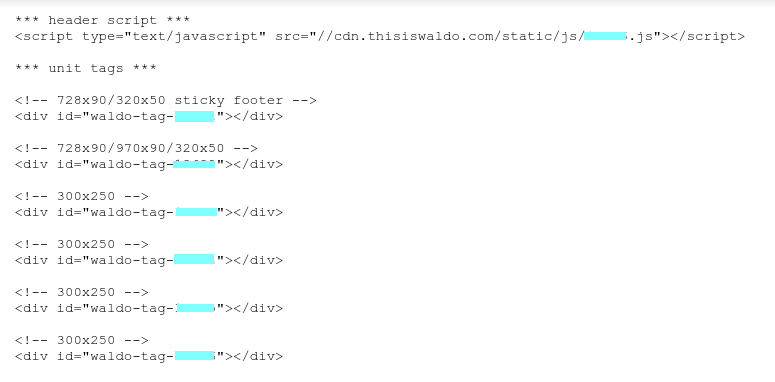
There are two things in this file:
- A header script. This piece of code runs on your site to load the ads.
- The unit tags. These are the placeholders for your ads. The header script fills these each time a visitor opens up your site.
Getting these to your site doesn’t require any technical skills. However, if this looks stressful, ask for your account manager to set them up for you.
Setting up the header script is easy.
In technical terms, you need to add the header script to the <head> tag of your website.
Sounds non-sense?
Don’t worry, there is a plugin that does it for you. If you are a WordPress user, install a plugin called Insert Headers and Footers by WPBeginner. Then follow these steps:
- Install and activate the plugin
- Go to your WordPress admin dashboard
- Go to Settings > Insert Header and Footers
- This opens up a header and footer editor view.
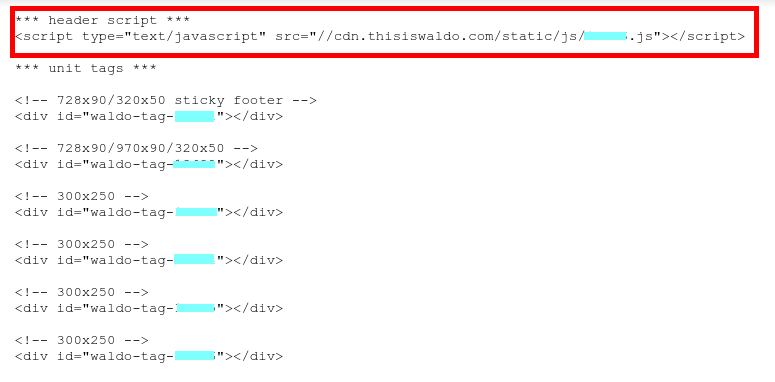
- Now copy and paste the header script to the Scripts in Header section. (Take a look at the screenshot below to figure out which parts to copy)
- Save the changes.
Good! Now you have added the functionality to load ads on your site.
Next, you need to insert the ad unit tags into your site. When this is done, the header script fills them with ads when someone visits your site.
Now, you don’t want to do this manually for all your blog posts separately. Instead, you can use a plugin that inserts the ads into all your blog posts. And by the way, this plugin lets you exclude ads from particular sites if you wish to.
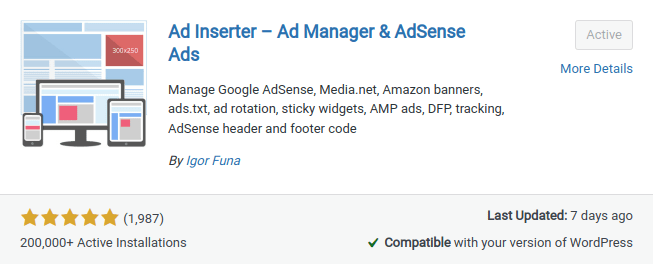
Assuming you are a WordPress user, install a new plugin called Ad Inserter.
- Go to your WordPress admin dashboard.
- Click on Settings > Ad Inserter.
- This opens up the ad inserter editor.
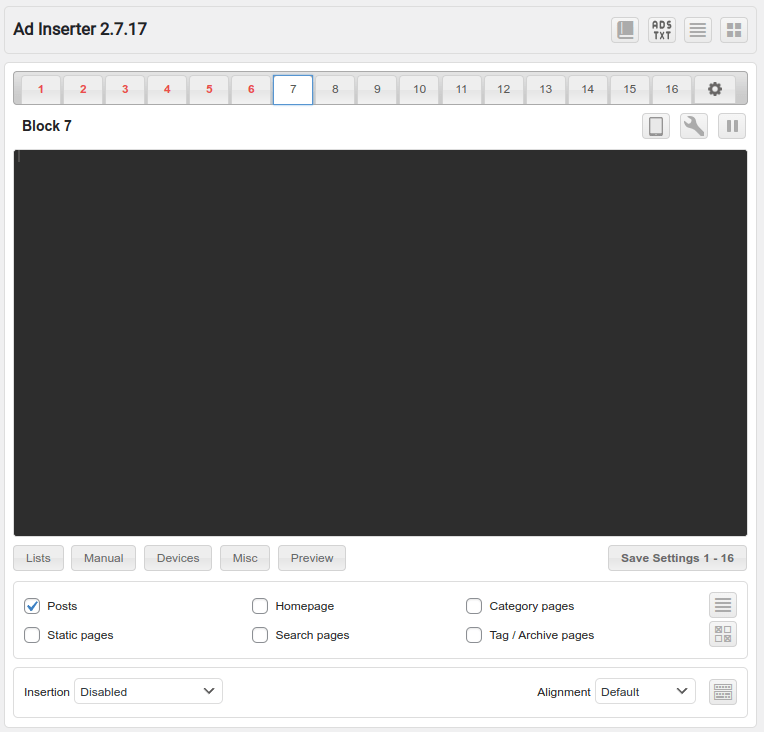
In the editor, you can see a bunch of numbered blocks. These blocks are where you should place your ad unit tags. Place each ad unit only once on a separate block.
Now take a look at your ad units and header script file.
The following picture illustrates the separate ad unit tags. In my case, there are 6 separate units that go to 6 different blocks in the Ad Inserter plugin.
Now, it’s up to you how you want to place the ads on your blog posts. I recommend asking for best practices from your account manager, or then Google up some ideas.
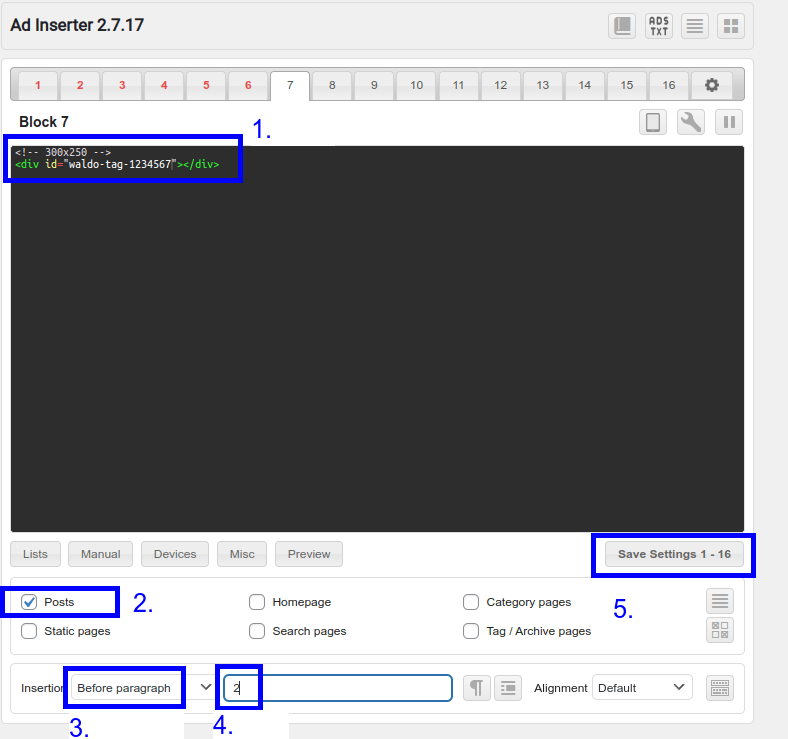
For example, let’s place a 300×250 ad before the 2nd paragraph of each blog post.
- First, copy one of the ad unit tags into your clipboard.
- Choose one of the empty blocks in Ad Inserter.
- Paste the ad unit tag to the empty block.
- Check the Posts checkbox.
- Choose “Before paragraph” from the Insertion dropdown.
- Specify the chapter before you want to insert the ad.
- Save the settings.
Here is an image illustration of the entire process.
Now you should have your first ad showing up on all your blog posts!
To make sure this is the case, stop all ad-blocking software on your site. Then head over to your site. You should now see an automatic Privacy Disclaimer on your site. Then, choose any blog post, and check before the 2nd paragraph.
To insert the rest of your ad units, place them onto separate blocks in the Ad Inserter tool!
Ad Inserter Tip: To place ad units proportionally, use a fractional number between 0 and 1. For example, to make an ad appear 50% through each post, choose Insertion > Before Paragraph > 0.5.
Now, if you want to exclude some blog posts from showing ads, head over to your Newor Media dashboard.
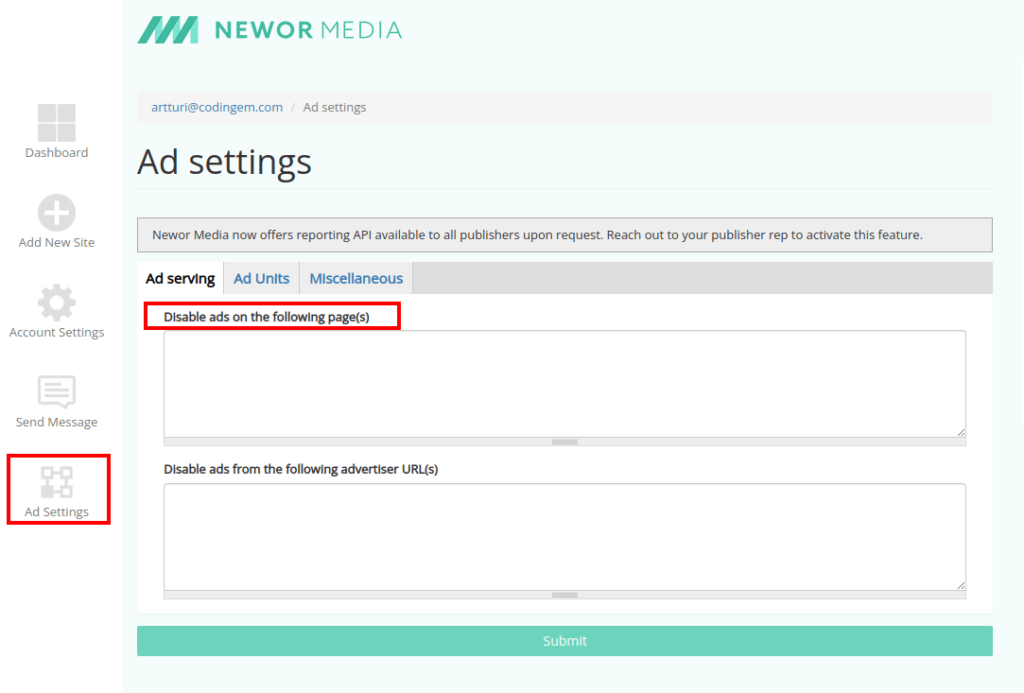
This way you can keep particular posts clean of ads. For example, this may be worth considering if you have affiliate posts.
At this point, your Newor Media ad units should be up and running. Now, open any of your blog posts to see all the ad units that appear on the site.
If you don’t see some, ask your account manager to troubleshoot the issues. For example, I had 5/6 ads showing up. The one that didn’t appear had to be re-created by Newor Team to make it work.
9. Wait for Demand to Ramp Up
Now, you need to be patient. Even though your ads are live, you still won’t earn much for the first 3-4 weeks.
Your first-day earnings can go up by 200-300% during the first four weeks.
This is because there is not enough ad demand for your site yet. Thus, your ad space is sold to lower bidders.
Luckily, you don’t have to worry about this. The demand ramps up automatically behind the scenes.
Newor Media: Pros & Cons
Let’s take a brief look at the pros and cons of Newor Media.
Pros
- Easy to set up. Even if you have never worked with ads before, Newor Media makes setting things up a breeze.
- Good earnings (compared to AdSense). Generally, you will earn much more on Newor than on AdSense. You might even top your Ezoic earnings on Newor Media.
- Friendly customer service. Newor Media team is awesome. A bunch of friendly people is always willing to help you.
- Useful analytics. The analytics features allow for an easy overall view of the ad performance. If you are a numbers person, this is something you’ll definitely like.
Cons
- The customer support is occasionally busy. Your account managers are busy. It can take a while for them to respond to your inquiries.
- Six ads per page limit. To keep your site’s user experience at bay, Newor doesn’t offer more than 6 ads per page.
- Earning model. Newor uses a cost-per-impression (CPI) model for revenue. If you have used the cost-per-click (CPC) model, you might find this approach a bit less profitable.
Last but not least, I’d like to share my experience with Newor Media thus far.
My Experience with Newor Media
Before I joined Newor, I was approached by the Newor team. They noticed my blog has hundreds of thousands of monthly page views and no ads.
I jumped on a call with one of their salesperson. We chatted for 30 minutes and I asked all sorts of questions as a beginner in advertising.
In the call, I expressed my willingness to show ads on my site but also shared my concerns (UI/UX issues, too low earnings, and so on). I also asked how their system works to better understand what I’m signing up for.
After chatting for 30 minutes or so, I was convinced to try it!
Due to the timezone differences and lengthy Google Ad Manager approval processes, it took 10 days from signup to show the first ads. Although it’s a big number of days, it only took 2-3 working hours of my time!
From start to finish, I was happy with the process. The only downside was the delay in responses and long approval processes. But I guess this is something you cannot avoid.
Bottom Line
Newor Media is a great ad solution for anyone looking to increase ad revenue while keeping the website clean.
They offer an easy solution for displaying quality ads on your website. Even as a beginner, it only takes a couple of hours to get the ads up and running.
You don’t have to sign agreements (other than the ad insertion one) or pay for anything. This way Newor Media is definitely worth giving a try as you cannot lose anything.
FAQ
Last but not least, let’s run through common questions you may have related to Newor Media.
Who Is Newor Media Best for?
If you are a blogger who wants to monetize your site, New Media is a great choice. Here are four situations in which you should consider Newor Media:
- Maximize Earnings. Newor Media specializes in maximizing your website’s ad revenue. If you have a blog or a website and want to earn more without spending more time, try Newor Media.
- AdSense Alternative. If you are using ad networks, such as AdSense or Ezoic, you will likely earn much more with Newor Media.
- Impression-Based Payments. Let’s face it. Most visitors don’t click ads. I mean how many times have you clicked ads on a site? This is where Newor Media excels. Instead of getting paid only for clicks, you also get compensated for impressions.
- Great Reports and Analytics. Newor has a great reporting dashboard.
How Long Does It take to Set Up Ads on Newor Media?
As stated earlier, setting up the ads requires a bit of back-and-forth emailing. Also, you need to be approved by Google, which can take a couple of days.
Getting the ads up and running takes a week or two depending on how actively you answer their emails.
Also, because the demand must ramp up for a couple of weeks, you can expect to reach your full potential about 4-5 weeks after you applied for the program.
How Long Does It Take to Start Earning?
You can start earning right as you place your first Newor Ad units on your site.
It takes around 24 hours for the advertisers to report the earnings. Thus, you don’t see any earnings on the first day yet.
Also, remember that the ad demand must ramp up for your site. In other words, you need to wait for a couple of weeks to attract all the advertisers to bid for your ad space.
This means your earnings will gradually increase for the first 3-4 weeks. So if you are earning less than you expected during the first days or weeks, it’s nothing to worry about!
What Are the Requirements to Join?
To join Newor Media, a publisher must have at least 30,000 page views per month.
Besides, no borderline content is accepted. In other words, your content cannot fall into any one of these categories:
- Sex
- Drugs
- Gambling
- Guns
Is Newor Media Good for Coding Blogs?
Yes, Newor Media is a great ad partner for an educational website like a coding site. They show ads that are relevant to the coding audience.
When busy coder looks for information in Google, they are unlikely to click on ads. On Newor Media, this is not an issue. The cost-per-impression model makes sure you get paid even if no ads were clicked.
How Much Can You Earn on Newor?
Newor Media Pays for impressions. This means your ads don’t need to be clicked for you to make money.
That being said, it depends on the niche as to how much you are going to earn.
You are probably going to see $5-$10/1,000 page visits.
So a website with 30,000 page views makes around $150-$300/month, which is really great!
By the way, feel free to use Newor’s Ad Revenue Estimator to get an idea of your earnings! Notice that the calculator tends to underperform, so you will likely earn more than it suggests.
Is Newor Media Legit?
Yes, Newor Media is a legit business. They have a legitimate business run by a team of professional and friendly people.
Newor is also an official advertising partner of Google.
Are There Contracts to Sign?
One of the great things about Newor Media is it’s a non-exclusive platform.
In other words, there are no contracts to sign.
However, you need to fill in an insertion agreement. This grants rights for Newor to place ads on your site.
How and When Do You Get Paid?
Newor Media follows a NET30 payment basis.
This means they will transfer the funds within 30 days of receiving them.
You can get paid via Paypal or Payoneer.
Wire transfers are also supported. But with wire transfers, there’s a $250.00 payment threshold.
Wrap Up
| Review | Newor Media |
| Summary | Newor Media is a Google-approved ad management service that uses header bidding to auction ad units to maximize ad revenue. |
| Author | Artturi Jalli |
| Rating | 4.1 (out of 5) |
Newor Media is an ad management company. It uses header bidding to auction ad units. This way the blogger will maximize their revenue.
Overall, Newor Media is a great solution. They have a friendly team, and quality ads, and they won’t slow your site down or clutter the UI.
Thanks to the free services and lack of unnecessary contracts, anyone should give Newor a try.
Before applying, make sure to have at least 30,000 monthly page views. Also, your site cannot have borderline content, such as guns or drugs.
In my opinion, bloggers should be paid for the time they spend writing. Ad partners like Newor Media make this possible!
Thanks for reading and happy blogging!
Read Also
Another great AdSense alternative is called Ezoic. Read my complete review of Ezoic ads.